
Enable Virtualization Windows 10
The Windows 10 operating system has features that enable virtualization. The first step to enable virtualization is to enable the virtualization option in your BIOS. Your BIOS settings will have different names than those in Windows 10. If you can’t find this setting, use the Windows key to search for “advanced menu”.
Enabling virtualization windows 10 with Hyper-V allows you to run virtual machines on your computer. To enable this feature, first ensure that Hyper-V is enabled in your BIOS. Make sure to check that your BIOS supports virtualization, and restart your computer when you are done Goolge.

Next, open the Hyper-V Manager application. You should find a link on the Actions pane that says “New Virtual Machine.” You can click on this link to create a new virtual machine. The wizard will prompt you to enter a name for the virtual machine. You can also select the generation for the virtual machine. Generation 2 supports most 64-bit versions of Windows, as well as newer Linux and FreeBSD operating systems.
How To Enable Virtualization Hyper-V:
You should see a window titled “Windows Features.” In the “Windows Features” window, select the Hyper-V option. You will need to restart your PC to apply the changes.
In Windows 10, you can check if your system supports virtualization by using a free tool. You can run this tool by going to the Start menu and searching for “Virtualization Checker.” This program will query your processor’s processor information, including whether it supports virtualization.
How To Checking If Your System Supports Virtualization:
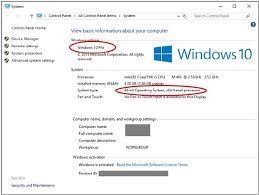
First, open the System Information tool. This tool gives you detailed information about your system. You can open the system information tool by clicking the Start button. Next, click on the System Information tool and type “systeminfo”. The System Information tool will display the details of your system. If your system supports Hyper-V, you should see a green check mark next to “Yes” in the virtualization requirement section.
If your system does not support virtualization, you should check your BIOS. Some PC manufacturers have added virtualization functionality to the BIOS. If this is the case, you can update your BIOS from the manufacturer’s website.
How To Adding A Virtual Machine:
Adding a virtual machine to Windows 10 is easy and involves two basic steps. First, you need to choose a disk format. There are two main options: a fixed disk and a dynamic disk. A fixed disk is better if you don’t want your virtual machine to grow too large.
After choosing a disk format, you must choose a name for your virtual machine. It should be descriptive. The folder for the virtual machine should be named Windows 10 VM. You must also choose a Windows platform and a Windows 10 64-bit version. You must also enter a valid product key. If you don’t, you will have to generate a new one.
How Do I Enable Virtualization:
The next step in the process is creating the virtual machine. To do this, you must first choose a location for your new machine. For a beginner, you should use the default location, but advanced users may want to change it. You can also define a virtual machine’s generation. For example, a Generation 1 VM is suitable for simple use, whereas Generation 2 is for more advanced programs.
The first step in disabling virtualization on your PC is to check whether your processor supports the virtualization technology. If your processor does, you should see the virtualization icon in the task manager. If you cannot see the icon, try checking the BIOS or UEFI settings of your PC. Each manufacturer has a different BIOS screen, so the steps to disable or enable virtualization depend on your particular machine. If you are unsure of the exact steps to take, you can use the function keys, such as ESC and Del to open the BIOS.
Turn ON The System:
- Go to the Security tab and press Enter in CPU settings.
- Select Intel(R) Virtualization Technology and press Enter.
- Select Enable and press Enter.
- Press F10.
- Press Enter to select Yes to save the settings and start Windows.
If you cannot find this menu, go to the advanced tab. You should see a menu similar to ‘Device properties’. Select the Advanced tab and click Virtualization Technology. Once you are in this screen, choose “Enable” and then click “Yes.” If you still do not see the virtualization icon, you can click on the Advanced tab.
Leave a Reply