How Do I Enable Windows Photo Viewer
Whether you are using Windows Vista or Windows 7, you can make Windows Photo Viewer the default image viewer by adding it to the Windows Registry. You can then create a shortcut to open any pictures that you have stored in your computer’s storage. Enable Windows Photo Viewer.
Creating a shortcut to open stored pictures in Windows Photo Viewer can be done in a few simple steps. You can create a shortcut for multiple image folders, or just one. In addition, you can add actions to your shortcut Google.
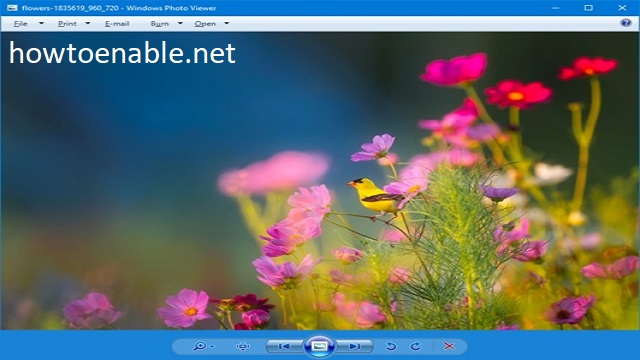
The Windows Photo Viewer is a great app for viewing your pictures. It has several editing options, such as adjusting the brightness and contrast. You can also change the size of the image or remove red eyes. You can view images full-screen, or use the arrow keys to cycle through the pictures.
How To Create A Shortcut To Open Stored Pictures:
The Windows Photo Viewer is not as fast as the built-in Photos app, but it is a lot less RAM consuming. In addition, it is more intuitive than the original Windows Photo Viewer.
If you want to use the Photos app, you can add it to the Start Menu, or pin it to your taskbar. Then, you can search for the pictures you want to view. You can also copy and paste files into the app.
How Make Windows Photo Viewer The Default Image Viewer:
Whether you are setting up a new PC or you have upgraded your Windows version, you can make Windows Photo Viewer the default image viewer. It isn’t hard to do, but you may have to do a few registry edits to get it working.
Firstly, you can set Windows Photo Viewer as the default image viewer for a number of different image file types. This is a great way to reduce the number of image-opening shortcuts you have to create. Also, the app will automatically open the image when you double-click a picture.
How To Open Videos In PNG Format With This App:
The Windows Photo Viewer has other features that you can set it to open as well. For example, you can open videos in PNG format with this app. You can also set it to open jpg files. I do the same for images in other formats. You can even set it to be the default image viewer for the Photos app.
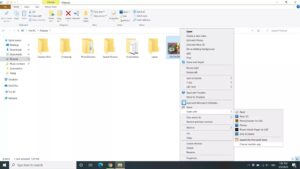
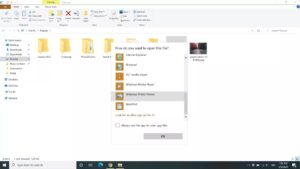
One of the best features of Windows Photo Viewer is its right-click context menu. You can use it to open image files with the right-click ‘Open with’ menu. Enable Windows Photo Viewer.
How Add Windows Photo Viewer To The Windows Registry:
Whether you’ve upgraded to Windows 10 or installed it from scratch, you may not have noticed that the Windows Photo Viewer is missing from your Start menu. However, you can easily reinstate the application by adding it to the Windows Registry. This will also allow you to set it as your default image viewer.
In order to restore the Windows Photo Viewer, you need to do two things: first, you need to download the correct Registration key file, and then, you need to merge it with the Windows Registry. The latter is not too hard, and it can be done with just a few clicks on the mouse.
How To Get Windows Photo Viewer Back:
You can also restore the Windows Photo Viewer by adding a registry script. This can be done by using a program such as Notepad. Once you’ve created a file, you can open it in Windows File Explorer. When you’ve finished, you’ll see a new registry entry. You can then edit the registry to set Windows Photo Viewer as your default image viewer.
Whenever you upgrade to Windows 10 from Windows 7 or 8.1, you may face the problem of getting Windows Photo Viewer back. The reason for this is that the photo viewing app is no longer the default app on Windows 10. Here are some easy steps to get Windows Photo Viewer back.
How To Restore Windows Photo Viewer In Windows 10
The first step is to open the Control Panel. Once you are in the Control Panel, you will find the settings. You can choose the settings to set a default app for pictures and videos. If you do not see Windows Photo Viewer in the list, you can also search for the app in the search bar.
Open The Settings App:
- Open the Settings app. …
- Click on Default Apps. …
- Select Windows Photo Viewer. …
- Get the Registry file. …
- Double click the registry file to run. …
- Tweak settings. …
- Select Windows Photo Viewer app. …
- Set file type to default to Windows Photos Viewer.
Next, you will need to install the Windows Photo Viewer. You can do this by downloading the file from Bleeping Computer. If you have downloaded the file, you will need to double-click it to merge it with the Windows Registry. Once you have done that, you can run the registry file to get Windows Photo Viewer back.
Leave a Reply