
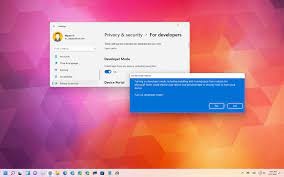
How to Enable Test Mode in Windows 11
One way to enable test mode is to use the command prompt. To access the command prompt, press the Win+Q key combination. Then, type CMD in the search bar. Make sure to run it as administrator. Then, you should be able to enable test mode. If you do not see this option, you can disable it from the BIOS. Enable Test Mode Windows 11
To disable driver signature enforcement in Windows 11, simply go to Advanced Startup Options and type “disable driver signature enforcement”. You can also go to CMD and select Command Prompt (Administrator) to disable this feature. By default, Windows enforces driver signing to prevent the installation of malware. By disabling driver signing, you can install unsigned drivers. But you should only do this if you know the source of the driver Google.

To disable driver signature enforcement, open the command prompt as an administrator, using the Windows key + R. Type “bcdedit /set TESTSIGNING OFF”. After entering the command, close the command prompt and restart the PC. This will restore your system to normal mode.
How To Turn Off Test Mode:
If you’re still having trouble installing drivers, try turning off the driver signature enforcement feature. You can also disable this feature by using the Command Prompt and Windows Explorer. Then, try installing a different driver. If you don’t see any, go back to the Windows Store and download a new one. Alternatively, you can try the Secure Boot function.
In Windows 11, you can use the command prompt to turn off the test mode. To do so, open the Start menu and type CMD. Then right-click on the command prompt result and select Run as Administrator. In the command prompt window, enter the code below to turn off Test Mode. Then restart your system. This will disable the testing mode and prevent any unsigned programs from working.
How To Disable Driver Signature Enforcement:
There are several ways to turn off the test mode. The most common way is to use the command prompt. To open it, press the Win+Q combination. Type in “cmd” and press Enter. Then, click “Run as administrator” from the pop-up menu. Then, you’ll be prompted to enter the administrator password.
You can also use Universal Watermark Disabler to remove the test mode inscription from your desktop. This utility is free and can be downloaded from the official website. After downloading it, install the tool by clicking on the “Install” button. It’s important to remember that turning off the test mode is not permanent, so if you need to restart your computer, don’t use it again. This won’t cause any problems and will remove the watermark.
How To Remove Watermark:
In Windows 11, you might notice a watermark in the bottom right corner of your desktop and the settings app. The message that appears states “System requirements not met.” This message is part of the Windows Insider Program and requires that your device meet the system requirements. You can check whether your system meets the requirements with the PC Health Check app.
To remove the watermark, you will need to restart your computer. In order to restart, you will need to run a command to enable Test Mode. Once you’ve run it, you’ll see a watermark near the clock. If you’d prefer to turn off Test Mode, you can disable driver signature enforcement. You can also try installing drivers that aren’t signed.
How To Disable Secure Boot In BIOS:
If you’re still having problems, consider using the universal watermark disabled. It’s one of the most popular utilities to remove this annoyance. It was first introduced in the early days of Windows 10 and has been used by many users ever since.
To enable test mode on Windows 11, you will need to disable secure boot on your PC motherboard. This mode will force Windows to load the BIOS settings, and you will be prompted to restart your PC. You can change this setting by pressing the arrow keys on your keyboard to move from Enable to Disable.
How Do I Run Test Mode In Windows 11:
To enable test mode on Windows, you need to make sure that your PC’s BIOS supports TPM 2.0 and UEFI. You can find out whether your computer supports these modes by checking the manufacturer’s website. You should also be able to install Windows 11 from UEFI if your computer supports it.
Using UEFI, Secure Boot protects your PC against malware that can attack its boot sector. This feature also increases your privacy and security on Windows 11.
Leave a Reply