How to Enable Test Mode Windows 10
If you want to enable test mode Windows 10 and can’t seem to get into it, the issue may be that you cannot access the boot configuration data store. If you don’t want to run into this issue, there are a few things you can try. First of all, you can try to disable driver signature enforcement. You can also try to remove the test mode watermark.
You may want to turn off driver signature enforcement on your Windows 10 PC. This can damage your system, so you need to be very careful! This process can be done using the Test Mode feature. Simply open the Administrator Command Prompts by right-clicking the Start button and selecting PowerShell or type “test signing” and press Enter. The test-mode watermark will appear on your computer’s desktop Google.
To disable driver signature enforcement on Windows 10, you must be logged into an administrator account. This will allow you to run any program you wish. Then, navigate to the Command Prompt menu. Now, type the command “disable driver signature enforcement in test mode windows 10”. If you do this in the elevated command prompt, you will be given the option to disable driver signature enforcement forever. However, this process leaves your computer vulnerable to attack, so you should back up your drivers before you proceed. Disabling driver signature enforcement will protect your computer from malicious programs, but it will also prevent you from installing certain drivers.
How To Disable Test Mode:
After you’ve made these changes, you can restart your PC. You should be able to install unsigned drivers in test mode. Just be sure to disable Secure Boot Policy first.
If you encounter problems with applications that don’t work on Windows 10, you may be able to disable test mode. This feature will allow you to run an application in a limited way to test it. However, it is important to keep in mind that this mode can also cause non-signed applications to fail. There are several ways to fix this problem.
How To Disable Driver Signature Enforcement:
One of these ways is by using the Powershell command. You will need to type the command twice, and then restart the computer. You can also disable test mode by rebooting your system. This will prevent hackers from using it to break into your system. If you get an error message when you try to enable test mode, it is likely that Windows needs extra permissions and commands to run the application properly.

Once you have identified the cause of this error, you can disable it. If the error still persists, you can try rebooting the computer. You may need to install new drivers. If you are unable to reboot the computer, you can use the Windows key and Q to resolve it. Another option is to launch the command prompt by typing “cmd” and pressing Enter.
Remove test mode watermark
There are a few ways to disable testing mode on Windows 10. First of all, you can open the command prompt in the Start menu. If you are prompted to enter your administrator password, click OK to proceed. Alternatively, you can execute the credit command to disable the test sign in your system.
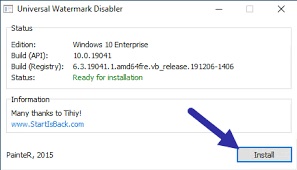
If you want to remove the test mode watermark on Windows 10, you need to take certain steps. You will need to install a program called Universal Watermark Disabler, which can be downloaded from here. Once you have installed it, double-click it to activate it and follow the prompts. After you have activated it, sign out of Windows and save any changes that have been made. Once you have finished, you will no longer see the watermark on your Windows 10 computer.
How Do I Enable Windows Test Mode:
Firstly, you must open the Command Prompt as an administrator. This can be done by searching for CMD in the Start menu. Then, right-click on the entry that says “Run as administrator.” Click the “Yes” button on the User Account Control window. Then, reboot your PC. This will remove the test mode watermark.
Another way to remove the test mode watermark on Windows 10 is to uninstall certain applications. This is especially helpful if you’re installing software that hasn’t been certified by Microsoft. Then, you can remove the watermark on your computer and resume normal use. This process should only take a few seconds.
Go To Settings Menu:
- Go to Update & Security > Recovery > Restart Now under Advanced Startup.
- After restarting your computer,
- Go to Troubleshooting > Disable driver signature enforcement under Startup Settings (press F7) > Restart.
- You can now install unsigned drivers.
Another way to remove the watermark on Windows 10 is to disable Test Mode in Windows’ control panel. The steps are similar to the previous method, but it involves starting the Command Prompt as an administrator. After you’ve finished, reboot the system and you’ll no longer have the test mode watermark.
Leave a Reply