How to Enable XMP Profiles on Your PC
You may be wondering how to enable XMP profiles on your PC. First, you must boot your machine to the BIOS. You can then access the BIOS menu to enable the XMP profiles. Your motherboard may have different profiles or manual overclocking options. It is important to remember that you can only enable this feature in the BIOS. Listed below are some common steps you need to follow. Listed below are the steps for enabling XMP on your PC.
You can check XMP by running CPU-Z. It will show you the timings of your RAM, which may differ from what the manufacturer advertised. If the RAM’s timings are higher than what the manufacturer advertises, XMP is not enabled. Afterwards, enable it manually. Make sure the settings are saved, otherwise, they may not work. You should test your system again to verify if you’ve made any necessary changes Google.
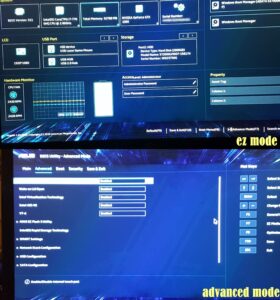
You can also enable XMP in your BIOS. To enable XMP, go to the memory profile tab. Press F10 to confirm. Then, press F7 to enter Advanced Mode. After this, select XMP 1.
How To Enable XMP Without Bios:
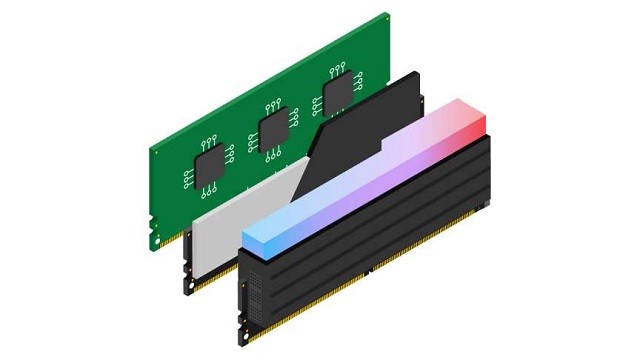
To enable XMP, you must first enable a BIOS option called “XMP Memory Profile.” If you have installed this option, the BIOS will automatically read the settings and make adjustments. If you’ve enabled this feature, you’ll be able to overclock your RAM, which is good for your system’s performance. Using XMP will increase your RAM speed by as much as 6%. This setting is also helpful for AMD users.

Once you’ve enabled XMP, your computer should automatically recognize the device. You’ll be able to see the performance increase in your game after enabling the bios. You can even tweak the frequency and voltage settings to make your PC more powerful. You can also check the performance of your computer by tweaking the XMP settings. Then, restart your PC and enjoy the benefits of XMP! It’s easy!
How To Enable XMP In Dell Bios:
Depending on your motherboard, you can enable XMP on your PC in BIOS. If your motherboard supports XMP, you should be able to select “Profile 1” if you have DDR4 memory. Then, you can enable each profile one by one. After you’ve enabled each profile, you can select the one with the faster memory speeds. Alternatively, you can also check the RAM timings in BIOS to find out which profile runs faster.
You’ll find this setting in the BIOS menu of most motherboards. It’s usually located in the Advanced section. It allows you to change the speed of DDr. Moreover, enabling XMP also allows you to select a faster boot speed. It’s not necessary to disable XMP on MSI motherboards. Using the BIOS in this way will increase the overall speed of the computer.
How To Enable XMP MSI:
Enabling XMP on your computer is one way to maximize the speed of your memory. If you’re using an active workstation, you’ll want to increase the speed of the memory, as higher speed RAM will make the viewport snappier and responsive. You can even enable multiple XMP profiles on some motherboards, each with different timings. Just be sure to read the instructions provided by the manufacturer and look for XMP settings in the BIOS.
Follow This Steps:
- Enter the BIOS and navigate to the Ai Tweaker section (or press F7 for a shortcut).
- Under Ai Overclock Tuner, find the XMP option and choose a profile to enable.
- After confirming that these are the settings you want,
- Press F7 to exit Ai Tweaker and F10 to save and restart your PC for XMP settings to take effect.
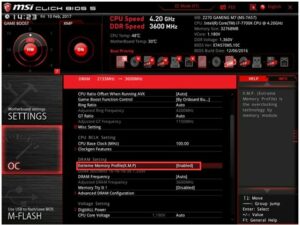
In the BIOS of MSI boards, you can choose to enable XMP or A-XMP in the Memory Configuration tab. Make sure to choose Profile 1 or 2 for your system and press F7. From there, you can access Advanced DRAM Configuration. This will give you more control over the frequency of your memory. You can even overclock your memory with the XMP settings. You can also try to change the frequency of your graphics card.
Leave a Reply