How to Enable XMP Without BIOS
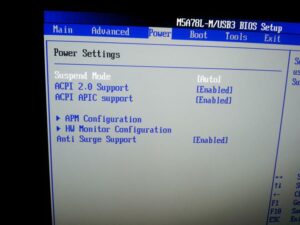
If you want to use enable XMP without BIOS, there are two ways to accomplish this. You can enable it in UEFI or the BIOS. Once enabled, XMP will allow you to set your memory’s rated speed. However, you can also disable it. This method is the most common. Follow the steps below to enable XMP on your PC. But, keep in mind that there are a few things that you should not do.
Once you have the BIOS enabled, it is possible to turn on XMP in advanced or ez mode. You can also choose the appropriate mode according to the motherboard you have. Usually, you can enable XMP by pressing F2 on your keyboard. However, it’s best to use the ez mode to enable XMP. In this mode, you must choose the correct bios setting for the motherboard google.
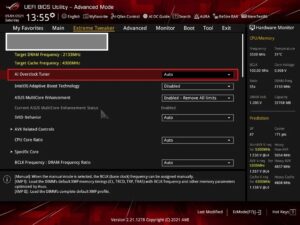
Once the motherboard supports XMP, you can start overclocking the memory. The process is easy. First, go into your motherboard’s BIOS and select EZ mode. Then, select your memory profile and hit F10. After selecting the EZ mode, reboot the PC. Alternatively, you can select the Advanced Mode and enable XMP. Once you have enabled XMP, you’ll have the option to adjust the RAM’s frequency and timings.
How To Overclock Ram Without BIOS:
Alternatively, you can also enable XMP in the BIOS. You can find the appropriate key in the BIOS documentation. In some motherboards, you’ll find the XMP key buried in the advanced RAM screen or under the Overclocking options. Asus BIOS, it’s on the first page. In Gigabyte and EVGA, the option is located under Advanced Memory Settings > Extreme Memory Profile.
After enabling XMP, you’ll have to change the RAM settings in the motherboard’s BIOS. This is an easy process, and it will help you overclock your RAM. You can also enable XMP on AMD motherboards to make the RAM run faster. AMD motherboards have an AMD Memory Profile option, which is nearly identical to XMP. However, some motherboards don’t support XMP, so you’ll have to upgrade your motherboard if you want to use it.
How To Enable XMP In MSI BIOS:
High-performance DDR4 runs above industry DDR specifications. To enable XMP in your motherboard, you should have the MS-7C98 or higher model. However, note that enabling XMP in the BIOS may void your processor’s warranty. So, be sure to consult your manual or contact your manufacturer for more information. Once you’ve enabled XMP on your motherboard, you’ll be able to enjoy high-performance DDR4 without risking system instability.
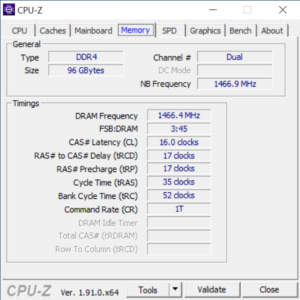
In case your motherboard doesn’t support XMP, you can also check whether XMP is enabled using the CPU-Z utility. Look at the SPD tab to see if XMP is enabled. If it does, you can change the timings in the RAM to make it run at a higher speed. Overclocking isn’t necessary, but it can help you get the best performance.
How To Enable XMP In BIOS Asus:
Once you’ve enabled XMP, you can start overclocking your memory. This is also good for the performance of your graphics card. If your graphics card has a low frequency, try setting up a low-power mode. Otherwise, you can also use a high-end mode. You can also use a memory management software. These software programs help you configure memory settings, including memory speed and compatibility.
Follow This Steps:
- Download, install, and use CPU-Z.
- Go to the SPD tab.
- See the SPD Ext field.
- When it says XMP, your RAM and system support XMP.
- If the field is empty, your RAM does not support it.
Once you’ve enabled XMP, you need to go into the BIOS and enable it. Make sure that you’re on an Intel Extreme Memory Profile (XMP), and leave Secondary and Tertiary timings on auto or manual. Ensure that you don’t enable Undervolting because Intel CPUs have a vulnerability called Plundervolt. AMD Turbo is also disabled by default, so you’ll need to check the compatibility of your graphics card with that BIOS.
Leave a Reply