
How to Enable Virtualization in BIOS
There are many ways to enable virtualization in a BIOS. The easiest method is to enter a command in the advanced CPU configuration window. Then, you should check the box to enable SVM. To do this, you must first make sure that you are running AMD-V. Then, you can enter the following commands into the BIOS: how to enable virtualization in bios para: To install the necessary features, you can use the DISM command. It is also recommended to restart your system after the installation is complete. After the system reboots, you should see a new option in the Advanced CPU configuration: virtualization.
To enable virtualization, you must enter the settings of your processor. You can do this by selecting the CPU tab in the Task Manager. You will need to click the Performance tab in the Intel Virtualization section. Then, select the option for the processor and click OK. In order to enable virtualization, you must save the changes to the BIOS. To test whether or not your CPU supports virtualization, you should open the system configuration window and run a “virtualization” command Google.
To access the Assist button, you should press the Down Arrow key. You will see the Assist button. Now, click on the Intel(R) Virtualization Technology. Then, you can click Enter. Finally, you will need to choose the Exit tab. Once you have done this, the BIOS will automatically start checking for new versions. If your computer doesn’t support virtualization, you can manually update the BIOS.
How Do I Enable Virtualization Technology In BIOS:
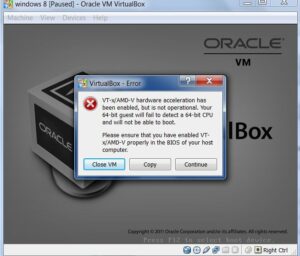
In order to enable virtualization in BIOS, you need to update the CPU. To do this, you should perform a Google search for the version of the BIOS for your particular PC. If your PC does not support virtualization, you will need to purchase an updated BIOS. To update the BIOS, you must also install the virtualization software. This software is available for most AMD and Intel systems. If you have an AMD V-Processor, you can use VT-x on your AMD system.
After downloading the latest version of the Hyper-V, you must go to the BIOS and click the Virtualization tab. If you do not see the Virtualization tab, you can click the AMD-V tab. To select this option, you must choose the processor. Then, click the Windows-V button. Alternatively, you may go to the Advanced section of your BIOS. However, you can choose the processor type.
How Do I Enter Virtualization In BIOS:
To enable virtualization in BIOS, power on the system. This will allow the operating system to make best use of the CPU. This will allow it to more effectively utilize the power of the CPU. It is important to note that you must also have a Windows compatible BIOS. If you want to disable the virtualization, you can turn off the device. But if you don’t have any, you should enable the corresponding bootloader.

You should also check the CPU tab. This will display the details about your CPU. In the BIOS, you should click on “Enable virtualization” to enable the feature. You will have to reboot into Windows to enable virtualization. It’s important to note that you need to restart your PC in order to configure the hardware in your PC. This is how to enable virtualization in bios. Once you’ve finished the initial boot up, you can then choose the processor that will run your PC.
Do I Need To Enable Virtualization In BIOS:
Once you’ve enabled virtualization, you can go to the Advanced tab and select it. From here, click the Virtualization toggle to enable the feature. After that, you can choose your CPU and reboot. After that, press F10 to reboot into Windows. Then, you can check your CPU and the virtualization tab. Then, you should choose Yes. It’s important to remember that enabling the hardware in the BIOS is essential to the performance of your computer.
Enabling Hardware Virtualization:
- Restart your computer and press the BIOS key. …
- Find the CPU configuration category. …
- Get Virtualization Settings. …
- Select the Virtualization Enable Option. …
- Save Changes. …
- Exit your BIOS and restart your computer.
Using the Advanced tab to enable virtualization in bios is the easiest way to enable this feature in a BIOS. After you’ve enabled virtualization, you can check the CPU’s information. Afterward, click the Virtualization tab to choose a virtualization option. Now, you can click on the Enable button to enable the feature. If you haven’t done so yet, the next step is to go into the Advanced tab.
Leave a Reply