
How to Enable Secure Boot in Lenovo Legion
In order to enable Secure Boot in lenovo, you need to first switch the system from Legacy to UEFI mode. This feature will allow you to disable or enable Secure Boot. To do this, click the “Assert Physical Presence” option and follow the instructions to confirm your change. You’ll be prompted to enter a password when you confirm your changes. After the security check is complete, you’ll be able to reboot your PC.
To enable Secure Boot, press the power button on your Lenovo laptop and press the Esc key repeatedly. Then, click on the Security tab. Make sure that you select UEFI/legacy boot. Finally, press F10 to open the boot menu. Under the Security section, select Legacy Support and Secure Startup. Next, click on Secure Boot Enable. Once you see the menu, press the “Enter” key again to continue.
The next step is to go to the BIOS screen and enable Secure Boot. To do this, press the power button and hold down the Shift key while selecting Restart. Then, select the option to disable Legacy Support and Secure Boot and choose it. Once you have selected Legacy Support and Secure UEFI, click on the Legacy Boot option. Once you have successfully disabled the Secure Boot option, your computer should reboot and be able to run the Windows Operating System.
How To Enable Secure Boot In Lenovo Legion:
To enable Secure Boot, you must be in the UEFI mode and you must be logged in as the administrator to access the BIOS. To turn off Legacy Boot Mode, you must reinstall the operating system. Once you’ve completed this process, press F10 to access the boot menu. After that, you should see an entry for the Intel Network Boot Agent. To activate Secure Lock, select the checkbox next to the option and reboot your laptop.
Once you’ve done this, you’ll need to change the settings to enable Secure Boot. The UEFI setup screen will show you how to do this by selecting “UEFI” and “UEFI Mode” as the two options. Once you’ve set Secure Boot, you’ll need to press the F2 key again and start the BIOS. After that, select the Secure Boot option and press the F12 key to enter the BIOS.
How To Enable Secure Boot Lenovo Legion:
Once you’ve made sure you have UEFI, you should enable Secure Boot. This will ensure that your PC’s operating system only boots with trusted firmware. By enabling Secure Boot, you can prevent malware from attacking your PC and gaining access to your data. If you don’t want to go through this hassle, then you can simply disable it from the BIOS settings menu. If you’re having trouble enabling it, you can use the UEFI key to access the BIOS.
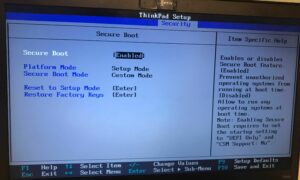
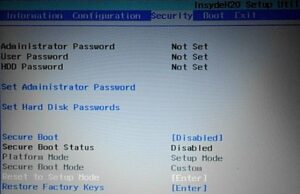
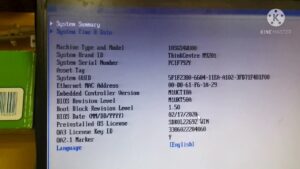
After you’ve enabled Secure Boot, you need to go to the BIOS setup screen and click “Secure Boot” to confirm. The BIOS is the key to enabling this feature. Then, you should press the F2 key to enter the BIOS. A series of menus will appear, displaying the BIOS information. If you don’t see the option, click “Secure Boot” and you’ll be prompted to enter the password.
How To Enable Secure Boot Option In Bios Lenovo:
If you’re using UEFI, you should enable Secure Boot by clicking the “UEFI” icon on the BIOS menu. You should make sure that your BIOS is configured for UEFI mode. If you’re using Legacy BIOS mode, you should convert your hard drive to GPT for Secure Boot. When you’ve done this, you can access the secure boot menu and make changes.
enable Secure Boot on Lenovo:
- Press the power button to turn on the computer.
- Then quickly press F2 or Fn + F2 to enter the BIOS.
- Select Security – Protect Launch, and select Enable.
- Save changes and Exit.
If you’re using Windows, you’ll need to disable Secure Boot to access the BIOS menu. To do this, you need to select the advanced option under Troubleshoot and then enter the keys that will enable Secure Boot. Once you’ve entered the password, the system will begin to boot into the safe mode. If you’re using Windows, you’d want to select the option under ‘Advanced’.
Leave a Reply