How to Turn on Remote Desktop in Windows 10
Turn On Remote Desktop In Windows 10 program allows you to connect to another computer over the local network or internet. It’s a great way to troubleshoot issues, access files, and more.
While enabling this feature was once done via Control Panel, the modern Windows 10 and 11 experience includes options in the Settings app. These settings allow the PC to be accessed remotely and also keep it awake and discoverable for connections.
Enabling Remote Desktop on a Windows 10 computer allows you to access it from another device, providing a convenient way to manage your system remotely. Follow these steps to turn on Remote Desktop.
1. Check System Requirements:
Before enabling Remote Desktop, ensure that your Windows 10 edition supports this feature. The Home edition does not include it, but Pro, Enterprise, and Education editions do. To check your edition, right-click the Start button, select “System,” and look under the “Windows specifications” section.
2. Verify Network Connection:
Ensure that both devices are connected to the same local network or have proper internet access if connecting remotely. A stable and secure network connection is crucial for Remote Desktop functionality.
3. Configure System Settings:
- Right-click the Start button and select “System.”
- In the System window, click “Advanced system settings” on the left sidebar.
- Navigate to the “Remote” tab.
- In the “Remote Desktop” section, check the box labeled “Allow Remote connections to this computer.”
- Click “Apply” and then “OK” to save the changes.
4. Adjust Firewall Settings:
Windows Firewall may block Remote Desktop connections. To ensure proper access, follow these steps:
- Open the Windows Defender Security Center.
- Click on “Firewall & network protection.”
- Click on the active network profile (Private or Public).
- Toggle the switch under “Remote Desktop” to enable it.
5. Configure Remote Desktop Services:
To allow specific users to connect remotely, you need to configure the Remote Desktop Users group:
- Press Win + R to open the Run dialog, type “sysdm.cpl,” and press Enter.
- Navigate to the “Remote” tab.
- Click “Select Users.”
- In the Remote Desktop Users dialog, click “Add” to add users who will have remote access.
- Click “OK” to save the changes.
6. Obtain the Computer’s IP Address:
You need the computer’s IP address to connect remotely. To find it:
- Press Win + X and select “Command Prompt” or “PowerShell.”
- Type “ipconfig” and press Enter.
- Look for the “IPv4 Address” under the network adapter connected to your network.
7. Connect Remotely:
On the remote device:
- Press Win + R, type “mstsc,” and press Enter to open the Remote Desktop Connection window.
- Enter the IP address or computer name of the target Windows 10 machine.
- Click “Connect.”
8. Provide Credentials:
You will be prompted to enter the username and password of the account you configured for remote access. Enter the information and click “OK.”
9. Customize Remote Desktop Settings:
To enhance your Remote Desktop experience, explore the “Show Options” button before connecting. You can adjust display settings, local resources, and more.
10. Disconnect and Log Out:
When you’re done with your remote session, it’s essential to disconnect properly. Use the “Start” menu to log out or disconnect to avoid leaving sensitive information accessible.
By following these steps, you can successfully enable and use Remote Desktop on your Windows 10 computer, allowing convenient access from other devices. Always ensure that your connection is secure, and you follow best practices for remote access to maintain the security of your system.
1. Go to Settings
The easiest way to enable remote desktop in windows 10 is through the Settings app. This method allows you to enable Network Level Authentication, which thwarts false connections and certain attacks, such as Denial of Service. You can also complete this task through the Control Panel, but this method requires you to configure rules in your firewall manually.
Click or tap the Start button and then click or tap Settings. This opens the app or the Settings menu, depending on the type of device you are using.
If you are unable to open the app, press WinX or right-click the Start button and then click or tap Settings. You can also use the search box on the taskbar to quickly open the app. I can also use the command ms-settings: in the Run window to open the app instantly.
You can also use the PowerShell to enable remote desktop in windows 10. In the search box, type command prompt and then right-click the option that says “Command Prompt.” Then, enter the following stated command and press Enter. This will allow you to connect to a computer over the Internet, even if your Windows Firewall is enabled. This is an important security feature for all Windows devices. It should be noted that you will not be able to connect to a Mac or Linux device with this method, because these operating systems do not support RDP.
2. Click on System
Remote Desktop is a feature in windows that lets you access and control a device from anywhere. It allows you to troubleshoot issues and access files without having to be physically present at the device. It can be used over the local network or over the internet. In previous versions of windows, you had to enable remote desktop through the control panel. Now, however, you can do so through the Settings app.
Once you have enabled remote desktop, the next step is to ensure that the required services are running on the device. To do this, open the task manager and then search for “Services”. From the list of results, select the one called Remote Desktop and make sure that it has a status of running. If the service is not running, it may be blocked by a firewall or by your ISP.
You can also configure a static IP address on the device to prevent it from being redirected to a different computer if you need to access it remotely. This will help to avoid a lot of headaches down the line. The system settings will automatically update to deploy the necessary rules in the built-in Microsoft firewall, but you may need to manually create them if you are using a third-party firewall. You can also choose to require network-level authentication, which will add an extra layer of security to the connection.
3. Click on Remote Desktop
The Remote Desktop protocol is used to control another computer via the internet. The protocol can be used for a variety of purposes, including administrating a server and connecting to a work or home computer. There are several different ways to enable the Remote Desktop protocol on a Windows system. One way is to use the Windows settings interface. Another way is to use a separate downloadable app. Both methods offer the same functionality, but the settings interface provides more validation and security features.
When using the settings method, a user must specify the host computer’s public IP address in order to access it remotely. This is necessary because computers typically receive a dynamic IP address from their DHCP server, which can change over time. The setting also enables Network Level Authentication, which can help protect the host computer from attacks such as Denial of Service attacks.
To enable the setting, click the Start button and select Settings. Then click the System option, and then click the Remote Desktop option. Then, check the box next to “Allow remote connections to this computer through the Remote Desktop Connection” option. This will ensure that the remote computer can be accessed from other computers on the same network. In addition, the Windows 10 settings method will add the proper rules to the built-in Microsoft Defender Firewall.
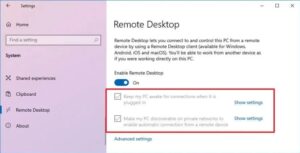
4. Click on Allow
You can enable remote desktop in windows 10 via the modern remote desktop app or the Control Panel. The first step is to open the Control Panel by searching for it in the Start menu or using the run dialog box (Windows Key + R). Once the Control Panel is open, select “System”.
Toggle the button next to “Allow remote connections to this computer” to the On position. A confirmation window will appear that reminds you that turning on Remote Desktop can allow others to access your computer, so choose carefully which users are allowed to connect remotely. You can also specify the PC name that will be used for this connection and set whether to keep the computer awake and discoverable to facilitate connections.
If you are having trouble connecting to a computer via remote desktop, you may want to contact your ISP to ask if their security protocols are blocking connections from outside the local network. You can also try using a different hostname or changing the listening port number on your router to resolve this issue.
Once the remote connection is established, you can work on the computer as if you were physically present. To disconnect from the computer, close the Remote Desktop window or click the three-dotted menu button in the top-middle and then click the Disconnect button.
Leave a Reply