
How to Enable Hard Drive in BIOS Windows 10
One of the most common problems with enable hard drive in bios windows 10 is that they don’t appear in Windows. If you can’t see the drive in the BIOS, Windows won’t see it at all. Some users report that restarting the computer fixes the problem. This is not a reliable solution, however, because it doesn’t fix the root cause. You can try the following steps to enable your hard drive:
First, make sure the hard drive is plugged into your computer. It is plugged in but is not showing up in Windows, there is a problem with the data cable. If it is a serial ATA cable, you might have disconnected it from your computer. If the drive is a USB type, the BIOS may not recognize it as a USB flash drive. You can try rebooting your computer, but you might end up losing your data Google.
To test if your hard drive is properly connected to the computer, you can try connecting it to another USB port. If your hard drive isn’t detected in Windows 10, you may need to reconnect it to your computer. If it still doesn’t detect, you may have another problem. In this case, you’ll have to disable any other USB ports that are not currently being used. If this doesn’t fix the problem, you can try entering BIOS and see if the hard drive is properly connected.
Hard Drive Not Showing Up In BIOS Boot Options:
Next, check the USB port of your hard drive. If it isn’t showing in the BIOS, you might have a faulty USB port. Turn off this USB port in the System Setup and reboot your computer. Then, you can try connecting it to the other USB port. If the USB port is working, you should see the second hard drive in the BIOS. You can also check whether the second disk is detected in Windows.
In the BIOS, you must enable the hard drive. The internal HDD must be connected to the motherboard in order to be recognized. If the internal HDD is not visible in the BIOS, it won’t be recognized at all. If it’s not visible, you need to connect it to the motherboard. Otherwise, it might not be working at all. If you don’t see it, you can check whether the other USB port is working by using another USB port.
Hard Drive Not Showing Up In BIOS Windows 10:
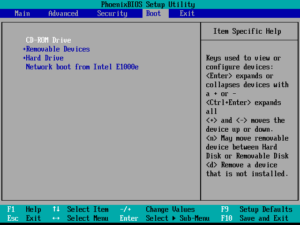
After the computer is powered down, press the F10 key to enter the BIOS Setup menu. Select Advanced BIOS Features. You should set the first boot device as the primary hard drive. To ensure the integrity of your hard drive, you should ensure that it is properly connected to the motherboard. Once you’ve connected it to the motherboard, you should set the data cable to it. This will enable the hard drive to function.
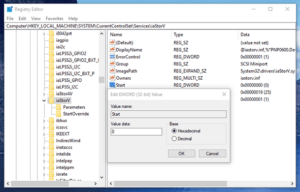
If you’re not able to see the hard drive in the BIOS, you need to install the drivers for your hard drive. Enable it in BIOS to make it functional. Also disable the hard drive in BIOS. You need to enter the BIOS to change its settings. You need to press the F2 or F1 keys in order to access the BIOS. Then, select Advanced BIOS Features.
How To Enable HDD In BIOS MSI:
You can use the partition wizard to create a new partition and drive letter for the hard drive. Then, you can click on the updated hard drive driver software and the hard drive will be recognized. This method will fix the problem if your hard drive is not spinning up. If you’re still having difficulty with the process of partitioning the PC, you can also install a SATA-USB enclosure.
Enable Hard Drive In BIOS:
Damaged or expired drive may be the reason why SATA or ATA hard drive can be detected in the BIOS. Therefore, you can try to update the drivers and see if the problem has been fixed or not.
- Click the “Start” button, type “Device Manager” in the Search Box and hit Enter.
- Select “Device Manager”, expand the categories to get the name of your hard drive.
- Right-click the device and select “Update Drive Software …,” and select Automatically search for updated driver software.
- There is something wrong with your drive when there is a yellow exclamation point near the device.
- Right-click on the device with the yellow exclamation point next to it and then click “Properties.” Under the “General” tab, click “Troubleshoot” and follow the instructions to resolve it.
- If you are unable to fix the driver problem with the steps above, try re-installing the driver.
- Uninstall the drive in Device Manager, then restart the PC and Windows will automatically restore the drivers to your hard drive.
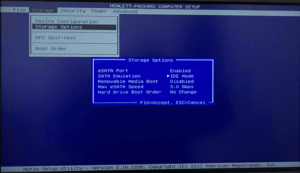
Before you enable the hard drive, you need to check the SATA connection. If the hard drive has insufficient power, it will not spin up. In order to test the SATA connection, you need to close the case and remove the hard disk. Open the case to access the data cable. You can then enable the hard drive in BIOS. The process of enabling the SATA connection varies depending on the type of computer you’re using.
Leave a Reply