How to Enable Find My iPhone on iCloud
Enable Find My iPhone On iCloud is Apple’s cloud storage service that allows you to track the location of iOS, macOS, Apple TV and watch OS devices, as well as Air Pods and even some third-party accessories. You can also remotely erase the contents of these devices if they’re lost or stolen.
However, iCloud is not without its privacy risks. Learn more about the cloud service, its security features and how to enable it on your device.
Enable Find My iPhone On iCloud is a crucial step in securing your Apple device and ensuring that you can locate it if it’s lost or stolen. The Find My iPhone feature allows you to track your device’s location, remotely lock it, play a sound, or even erase its data. To enable Find My iPhone on iCloud.
Follow These Steps:
- Ensure iOS Version Compatibility: Before you begin, make sure that your iPhone is running the latest version of iOS. Apple regularly updates its software to enhance security features, including those related to Find My iPhone.
- Connect to Wi-Fi: Connect your iPhone to a Wi-Fi network. Enabling Find My iPhone requires an internet connection to communicate with the iCloud servers.
- Sign in to iCloud: Open the Settings app on your iPhone and tap on your Apple ID at the top of the screen.
- Navigate to iCloud Settings: Scroll down and tap on “iCloud” in the Settings menu. If you are using an older iOS version, you might find iCloud settings directly without going into your Apple ID settings.
- Locate Find My iPhone: In the iCloud settings, find and tap on “Find My iPhone.” It might be listed as “Find My” in newer iOS versions.
Follow These Steps:
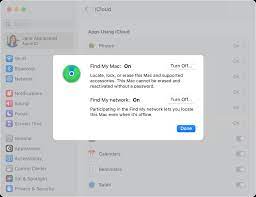
- Enable Find My iPhone: Toggle the switch next to “Find My iPhone” to the ON position. You may be prompted to enter your Apple ID password to confirm the action.
- Enable Send Last Location: Optionally, you can enable the “Send Last Location” feature. This will send the last known location of your iPhone to Apple when the battery is critically low, providing a useful hint about where to start looking.
- Set Up Two-Factor Authentication: To enhance the security of your Apple ID, it’s recommended to enable Two-Factor Authentication. This adds an extra layer of protection to your account and helps prevent unauthorized access.
- Configure Family Sharing (Optional): If you are part of a Family Sharing group, consider enabling location sharing with family members. This allows them to see the location of your devices and vice versa.
- Test Find My iPhone: Once you’ve enabled Find My iPhone, it’s a good idea to test the feature. You can do this by going to iCloud.com on a computer or using the Find My app on another iOS device. Log in with your Apple ID and check if your device appears on the map.
- Additional Considerations:
- Make sure that your device has sufficient battery life, as Find My iPhone relies on the device being powered on and connected to the internet.
- Keep Location Services enabled on your device for Find My iPhone to accurately track its location.
- Familiarize yourself with the Find My app, which provides additional features and functionality for managing your Apple devices.
Activation Lock
If you have Activation Lock enabled, a person who finds your device will see a message asking for your Apple ID and password. They can’t reactivate or reset the device without you signing in, which decreases the value of stolen devices and discourages theft. You can use Activation Lock to find your iPhone, iPad, Mac, or Apple Watch.
If a stolen device is online and connected to the Internet, you can play a sound on it from the iCloud website. You can also remotely erase a lost iOS device, which removes its personal information and settings. You can also set up a custom message to display on the device’s screen.
For organizations, Activation Lock provides a way to prevent unauthorized users from using and selling company devices. If someone else buys the device, they’ll have to sign out of iCloud and erase the content and settings before they can reuse it. Activation Lock also keeps track of who is using the device, so you can identify potential abusers.
To disable Activation Lock, the password owner must log in to the iCloud website and select All Devices at the top of the page. They can also select a contact number and a message to display on the lock screen.
Find My Maps
Unless you’ve disabled it, your iPhone keeps a highly detailed log of the places you go. Known as “Frequent Locations” or “Significant Locations,” it tracks your real-world movements and stores them for around a year in a hidden location in Settings.
You can see where you’ve been by tapping into this location history in Maps. It shows a list of cities you’ve visited and includes time stamps for when you arrived and left each place.
It’s also available for other apps that have permission to use Location Services, such as Google Maps and Uber. Viewing your Location History requires you to have a verified Apple ID and to enable Location Services on the device you want to see your history.
And if your iOS device is online and connected to the Internet, you can play a sound on it to help locate it or even let someone else hear its location. You can also remotely erase the device, removing its personal information and wiping it clean for good.
Play a Sound
If your iPhone is missing and turned off, or if it’s on silent or vibrate mode, you can use Find My to play a sound that will help you locate it. You can access the feature by logging in to the iCloud website using your Apple ID and password. Click the All Devices option at the top of the screen, select your phone and click Play a Sound.
If the iPhone is online and connected to Wi-Fi or cellular data, a sound plays after a short delay and increases in volume for two minutes. A Find My [device] alert appears on the screen and the iPhone also vibrates.
If you turn on Lost Mode, the phone displays a message asking whoever has it to return it to you. It also locks the screen, disables notifications, and prevents messages from being displayed on the lock screen. You can remotely erase the phone by clicking Erase This Device, but be sure to back up any important information before doing so. Credit and debit cards added to Apple Pay, as well as student IDs and transit cards stored in the Wallet app, will remain disabled until you regain access to the phone and sign in to iCloud with your iCloud account.
Erase
If you’re selling an old iPhone or giving it to someone else, you might want to erase all of your personal data on the phone before handing it over. This will ensure that no one else can access any private pictures or notes you’ve saved on the phone. Fortunately, you can do this remotely with iCloud.
Select the lost iPhone or iPad. If it’s online, you see a red trash icon and the words “Erase Pending.” The remote erasure will begin the next time the lost device connects to Wi-Fi or cellular data. If you want to save the information on your iPhone, back it up before erasing it or when prompted on the iPhone’s lock screen.
If you’re preparing to sell or give away your iPhone, follow the instructions in What to do before you sell or give away an iPhone, iPad, or iPod touch for steps to take to protect your information. To cancel an erase request, tap Devices at the bottom of the screen, then select the name of the device whose erase you want to cancel. You can also use iTunes to remove a device from your account if you’ve already remotely erased the content and settings on it.
Conclusion
Enabling Find My iPhone on iCloud is a straightforward process that adds a layer of security to your Apple device. Taking the time to set up this feature can save you from potential headaches if your device is ever misplaced or stolen. Regularly review your iCloud settings to ensure that Find My iPhone and other security features are up to date and configured to meet your needs.
Leave a Reply