
How to Enable Downloads on a Chromebook
In order to enable downloads on your Chromebook, you first need to open the Files app, which is located on the shelf of the device. This application looks like a blue folder and you can open it by right-clicking on the Downloads folder and then choosing the option to create a new folder inside of it. Once you’ve created the new folder, close the Files app and then open Chrome settings.
If you are having trouble downloading files from Google Drive on your Chromebook, there are a couple of things you can try. First, you need to create a folder on Google Drive. Name it appropriately and then click the Destination Folder button to save the downloaded files. Now, you need to configure your Chromebook so that you can access your Google Drive files. To do this, open the Files app on your Chromebook and expand the Advanced settings. Scroll down to the bottom of the screen and then click Change Google.
Once you’ve signed up for a free Google account, you can log in to Google Drive. Most Chromebooks come with free storage for one year. Once you’ve signed up, you’ll see the Google Drive folder in the Files app, which acts like local or flash storage. You can view your files in the Files app when you’re online. If you’re offline, you can still view and download your files from Google Drive.
How to Enable Downloads On A Windows:
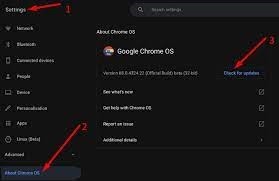
If you’ve been wondering how to enable downloads on a Chromebook, you’ve come to the right place. Here are a few easy steps to get your downloads going again. The first step is to clear the local data on your Chromebook. Sometimes, this is the cause of the download errors. To resolve the problem, try to download a video file from a verified website, or a PDF file, or even a ZIP archive.
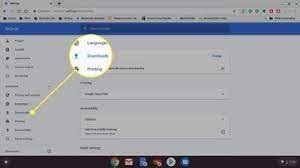
To do this, you need to go into the Files application and find the folder called Drive Downloads. This folder is found in the left-hand bottom part of the screen. To open it, click the circle with the dot in the center. You’ll see a list of all the files you’ve downloaded. Drag each file into a folder that is marked as permanent. To protect files, follow the instructions on the screen. After you’ve done that, click the time in the bottom-right corner of your screen. From there, click the gear icon in the top-right corner of your screen.
How to Enable Downloads On Samba:
If you use a network file share, like Samba, on your Chromebook, you can easily share files with other Chromebooks. To do this, sign in to your Google account and navigate to the Downloads section. Tap Shared folders, and select the network path and permission level. Then, you can share your files with anyone. Samba is the most common file-sharing system, and it is supported by most modern Chromebooks.
Although the code behind a Chromebook is based on the Samba file server, it is not the same as the Samba-based NAS devices. Samba is a group of Windows-interoperability programs that offer stable, fast, and secure file services. You’ll find Samba in just about every NAS device, including computers in your office and at home. Chromebooks already work with Active Directory, and most Intel-based models support it since Chrome OS 61. But, until now, they couldn’t access file resources stored on AD servers. Fortunately, they will soon be able to access shared folders using Chrome OS 70.
How to Enable Downloads On Windows Files App:
On Chromebooks, files are stored in the Downloads folder. This folder is a temporary space on the device. To access files stored on the Chromebook, open the Files app. Click the Launcher button at the bottom left corner of the screen to open the apps window. The Files app will be listed in the list of recently used apps. Select the file or folder you want to open, and then click the ‘up arrow’ to choose it.
The Files app opens in a separate window. You can customize your shortcuts to frequently used folders. Once you have configured your shortcuts, you can access the files stored in your Windows or Chrome OS cloud services. You can also pin files to your Files app panel by right-clicking them. You can also use the Files app shortcut to open the file manager. Once you’ve opened a file, you can click on it and choose ‘Pin to shelf’.
Ask Where To Save Each File Option:
To change the default download location of files on your Chromebook, you can toggle the “Ask where to save each file” option. This option will prompt you to choose a new folder before downloading the files. You can select a folder for all files or select one specific folder for each item. Then click the “Save” button to finish the download. You can change the location of files whenever you want, too.
File Download Settings On Your Chromebook:
- Quickly open the “Downloads” folder on
- Chrome OS devices directly in the browser window.
- Use its toolbar button or Alt + J keyboard shortcut.
- On Chromebook (Chrome OS), it will open the “Downloads”
- Folder in the browser tab instead of the Files app.
The “Ask where to save each file” option is especially helpful when you’re trying to download files without a network connection. This feature will prompt you to choose a new location for downloaded files, so you can save them on your computer’s hard drive. However, if you’re constantly disconnecting and reconnecting your Chromebook to the internet, you’ll quickly forget which files are important and which ones you should delete.
Leave a Reply