
How to Enable HDR in Windows 11
If you have a new computer running Windows 11, you can enable the HDR feature on your screen to enhance the appearance of your video displays. However, the feature is not enabled by default, and you’ll have to enable it manually. There are some simple steps you can take to enable HDR on your computer. After reading this article, you’ll be able to activate the HDR feature and enjoy the benefits that it brings.
The problem is that not all HDR displays are created equal. If your monitor is not HDR certified, it is very likely that the default settings are not enough to show you the true color spectrum. In some cases, you will be able to see only one-third of the true color range, leading to an unpleasant viewing experience. Additionally, content displayed on non-HDR displays can have brighter highlights and dark shadows. This clipping effect will make it difficult to see details in the highlights and shadows Google.
Fortunately, Windows 11 is not entirely without its problems. First, you need to make sure that your PC supports HDR. HDR requires that the display be compatible with the resolution of your screen. HDR isn’t supported over HDMI. Alternatively, your PC must be connected to a display that supports HDR. To test if your monitor is HDR compatible, you can use the DirectX Diagnostic Tool.
How To Enable HDR In Windows 10:
If you want to enable Auto HDR in Windows 11, there are a few steps you can take. First, you need to make sure your graphics card supports the feature. After that, you can open the Display Adapter properties in Control Panel and enable HDR. You can also click on the “Enable Auto HDR” option under the Gaming features menu. Then, you can use Auto HDR to take great HDR photos. Note that Auto HDR sometimes produces photos that look too HDR-ish.
If you’re looking to enable Auto HDR in Windows 11, the first step is to make sure your screen is HDR-compatible. You can determine this by looking up the name of your display in the display settings menu. To test HDR on your display, make sure you’re connected to an HDR-supported television.
How Problems With Enabling HDR In Video Games:
One of the most common problems that people have is having trouble enabling HDR in their video games. Unfortunately, Windows 11 makes it a little bit tricky to enable HDR, especially for older video games that use hardware that does not support this technology. However, there is a simple solution to this problem. Install a color profile for your display. This process can save you from hours of troubleshooting every time you play your favorite games.
To enable HDR in your video games in Windows 11, first, you must ensure that your display supports 1080p resolution. To enable this setting, press Win + I simultaneously. Next, choose “Rearrange your displays” from the Displays list. Make sure you have a display that supports HDR, or you’ll have problems. Make sure your display is at least 300 nits bright or it won’t work.
How Do I Play HDR Videos On Windows 11:
There are two major differences between DisplayPort and HDMI. DisplayPort 1.2 is a higher-bandwidth standard, whereas HDMI 2.0 is lower-bandwidth. The new standard is also compatible with VESA’s Y’CbCr subsampling, which will reduce bandwidth requirements for 8K displays.
Until recently, the two technologies shared a common feature: higher bandwidth. HDMI had the advantage when it came to higher-resolution displays, but DisplayPort had the upper hand in high-definition gaming. HDMI 2.1 (2017) used a higher transmission bandwidth than DisplayPort 1.2, but DisplayPort 2.0 (2019) reclaimed its throne. While both have their advantages, some people aren’t interested in the latter.
Does Windows 11 Support HDR:
If your monitor is not HDR compatible, you may experience problems while streaming HDR content on it. While Windows 10 supports HDR, you may still have issues when trying to use Windows 11’s HDR features. One possible cause for this issue is that you are using an incompatible HDMI cable. Make sure you use one that supports HDMI 2.0b. If this doesn’t solve your problem, here are a few things to do.
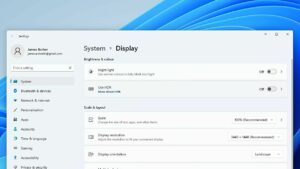
Select Settings:
- Select the Start button, then select Settings> Applications> Video playback.
- Under HDR video streaming, select Windows HD color settings.
- Under Select template, select the template you want to change.
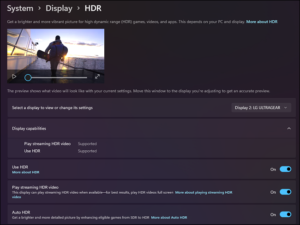
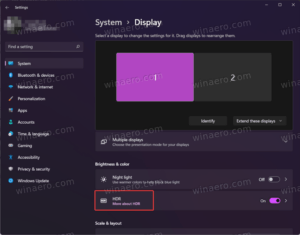
- If it is an external display, turn on Use HDR.
- Open HDR streaming video.
The first step is to make sure your external monitor supports HDR. If it doesn’t, you’ll have to manually enable the feature in Windows 11. HDR content only works with displays that support DisplayPort 1.4 or higher. Also, you need a PC with an integrated graphics card or dedicated graphics card to view HDR content. If the display doesn’t support HDR, Windows 11 will use PlayReady digital rights management for protected content.
Leave a Reply