
How to Enable Google Play Store on Chromebook
Enable Google Play Store On Chromebook is home to a wide variety of Android apps and other digital content. It is easy to enable and use on your chromebook.
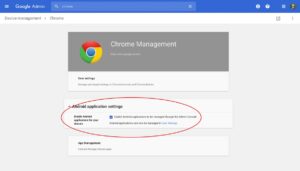
First, make sure that your Chromebook supports Android applications. You can check this with the Quick Settings panel or the cog on the system clock.
Enabling Google Play Store on a Chromebook allows you to access a wide range of Android apps, expanding the functionality of your device. The process involves a few steps, and I’ll guide you through them in detail.
1. Check Compatibility:
Before proceeding, ensure that your Chromebook supports the Google Play Store. Most recent Chromebooks have this feature, but it’s always good to verify. To do this:
- Click on the time in the bottom right corner.
- Select “Settings.”
- Under “Google Play Store,” check if the option “Install apps and games from Google Play on your Chromebook” is available.
2. Update Chrome OS: Ensure your Chrome OS is up to date to avoid any compatibility issues. To update:
- Click on the time in the bottom right corner.
- Select “Settings.”
- Under “About Chrome OS,” click on “Check for Updates.”
3. Enable Google Play Store: Once you’ve confirmed compatibility and updated your Chrome OS, enable the Google Play Store:
- In the Settings menu, find “Google Play Store” in the left sidebar.
- Click on it, and then check the box next to “Enable Google Play Store on your Chromebook.”
4. Accept Terms of Service: After enabling the Play Store, a pop-up will appear. Follow the on-screen instructions, agree to the Terms of Service, and sign in with your Google account.
5. Install Android Apps: With the Google Play Store enabled, you can start installing Android apps on your Chromebook. Open the Play Store from the app launcher or the bottom shelf and search for apps you want.
6. Manage App Permissions: You may need to manage permissions for specific apps. To do this:
- Go to Settings.
- Under “Apps,” find the app for which you want to adjust permissions.
- Click on the app, and under “Permissions,” make changes as needed.
7. Update Android Apps: Keep your Android apps up to date for the latest features and security updates:
- Open the Play Store.
- Click on your profile picture.
- Go to “Manage apps & device” and then “Updates.”
- Update individual apps or click “Update All.”
8. Troubleshooting: If you encounter issues, try the following troubleshooting steps:
- Restart your Chromebook.
- Check for Chrome OS updates.
- Clear the cache and data for the Play Store app in Settings > Apps.
9. Optimizing Android Apps for Chromebook: Some Android apps are optimized for larger screens. To find such apps:
- Open the Play Store.
- Look for the “Designed for tablets” section or check app descriptions for Chromebook compatibility.
10. Security Considerations: Be cautious about downloading apps from unknown sources. Stick to the Play Store for security. Chrome OS provides a secure environment, but it’s always good to exercise caution.
By following these steps, you should be able to enable and use the Google Play Store on your Chromebook effectively, expanding its functionality with a wide array of Android apps.
Enabling the Play Store
Adding the Google Play Store to your Chromebook can open up a whole new world of apps and games for you to enjoy. It will allow you to download many Android applications that you can use on your laptop, including popular games and productivity apps. However, it is important to note that some Android apps may not work on a Chromebook. For this reason, it is a good idea to make sure that your Chromebook has the latest updates and has a stable internet connection before you enable the Google Play Store.
To enable the Google Play Store, go to your Chromebook’s Settings app. Click the “Apps” tab and look for the “Google Play Store” option. There should be a “Turn on” button next to it. Click on it, and a window will appear that will guide you through the process of setting up the Play Store on your Chromebook. You will be asked to agree to the Google Play Terms of Service.
You should also be aware that the Google Play Store won’t work on a guest profile, so you will need to log in with your Google account or switch to a normal profile before you can use it. Moreover, you will need to restart the Chromebook in order to clear the cache and data, and the date and time must be correct in order to use the Google Play Store correctly.
Downloading Apps
The Google Play Store allows you to download a wide variety of Android apps and games. This feature can be a great way to add new functionality to your Chromebook. It is especially useful for productivity tools that don’t have native Chromebook versions. However, you should be aware that not all apps are compatible with Chromebook devices.
If you’re not sure whether your Chromebook supports Android apps, you can check by visiting the official Chrome OS website. Here, you can find a list of all supported Chromebooks and their hardware specifications. Some apps have specific requirements, such as screen size and phone functionality. For this reason, not all Chromebooks support Android apps.
To enable the Google Play Store, you need to make sure that your device is connected to the internet. You can do this by clicking on the Quick Settings panel (beside the system clock) and then selecting the Settings cog. Then, click on ‘Enable Google Play’ and follow the instructions to finish the process.
After enabling the Google Play Store, you can start downloading apps from it. Once you have downloaded an app, you can install it on your device by following the onscreen instructions. However, if you don’t want to use Android apps on your Chromebook, you can always disable the Play Store by following the same steps.
Installing Apps
Whether you’re looking to take your Chromebook gaming to the next level or simply expand your options for Android apps, enabling the Play Store is a great way to add more functionality to your device. To do this, first launch the “Settings” system app on your Chromebook (which you can find in your interface’s Launcher or by searching for it in your device shelf). Once the settings app is open, click the “Apps” tab and then click “Turn On”.
When you press this button, a window will appear on screen that guides you through the process of agreeing to Google Play terms. Once you’ve done so, the button at the top of the page will change to Installed, which indicates that the application is ready for use.
You’ll now be able to open the Play Store icon in your app launcher, sign in with your Google account, and start browsing for and downloading apps to your liking. Just remember that not all Android apps will work with your Chromebook, so it’s important to check compatibility before installing anything.
If you’re experiencing issues with the Play Store, restarting your Chromebook, checking for updates, clearing cache and data, disabling and re-enabling the app, or performing a factory resetting (Powerwash) on your Chromebook may help resolve them. If nothing seems to work, you might also want to consider contacting a technician or using the Google Play Store troubleshooter tool.
Removing Apps
If you’re not satisfied with the Android apps available on Chromebooks, there are several ways to remove them. For instance, you can uninstall the Play Store app or clear the cache of Google Play Services. Moreover, you can also try to use a different Wi-Fi connection or mobile hotspot. You can also try to update the Chrome OS. This will solve many issues that affect Play Store, such as error codes 7 and 8.
If your Chromebook isn’t getting the latest updates, you may have trouble installing apps from the Play Store. You can also try changing the date and time to see if this fixes the problem. In addition, you can try to use a different browser or device to download Android apps. Finally, you can try to run diagnostics to see if there are any problems with the hardware or software.
While most modern Chromebooks support Android apps, older devices may not. Older models, especially those without touchscreens or 2-in-1 designs, can struggle with Android apps that aren’t formatted for their screen size. Some Android apps can also crash when they force a full-screen window, which is something you should avoid at all costs. Fortunately, many older Chromebooks have been given access to the Play Store via an update to their operating system. You can check if your Chromebook has this feature by clicking the Quick Settings panel and then the Settings cog.
Leave a Reply