
How to Enable G-Sync on Laptop
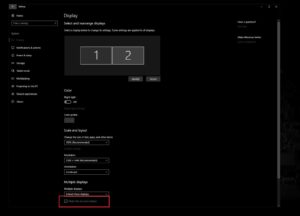
To enable G-Sync on your laptop, you must first make sure your screen supports it. Go to the display settings menu on your laptop and choose Monitor Technology. Then, under Manage 3D Settings, select G-Sync. You can also enable G-Sync for your secondary display. In case your laptop doesn’t have a G-Sync option, you can enable it manually. After enabling it, you must follow the instructions for each monitor in your system to make it work properly.
If your laptop has a G-Sync option, you can easily turn on and off the feature in the Nvidia Control Panel. If you don’t have a G-Sync option, look for the indicator center-screen. This feature lets you change the refresh rate of your monitor in real time. If you are using a gaming laptop, make sure to choose the correct port to connect the monitor to. AMD’s new technology is similar to G-Sync, but it is free to use Google.
The NVIDIA proprietary technology known as G-Sync is a type of variable refresh rate (VRR) technology that helps prevent screen tearing. While it is not the only VRR technology available, it has become a gold standard. Using G-Sync with a compatible Nvidia GPU will ensure that the refresh rate of your laptop display is always adjusted to match that of the video output. That means less tearing when playing games or watching movies on your laptop.
How To No G-Sync Option In Control Panel:
If you want to use G-Sync with your laptop, be sure to check that the graphics settings are optimized for the game. Games with low frames may not support it, so you may have to lower your settings. If it is not, you can try lowering your graphics settings to boost the frame rate of tough scenes. Otherwise, you will need to disable G-Sync if you don’t want to deal with the occasional screen tearing.
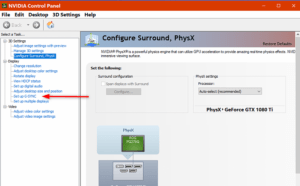
If your laptop monitor is not G-Sync-compatible, you will need to make sure your monitor is NVIDIA’s GPU 600 series. Laptop doesn’t support G-Sync, your monitor will still support adaptive refresh but will not support the full functionality of G-Sync. If you’re concerned about enabling G-Sync, then you can consult the NVIDIA control panel. To open the control panel, you should right-click on the desktop or open the application from the Start menu.
How To G-Sync Sync On Or Off 2021:
If you have any questions, you can also ask in the Razer community. The community is very helpful and will help you out. If you have any other queries or concerns, don’t hesitate to post your questions in the comments section below. It’s important to get a laptop with the latest technology, so you can enjoy your games with ease. Once you’ve installed G-Sync software, the monitor will automatically adapt to your laptop’s display.
While G-Sync may cost more than FreeSync, it’s worth the extra money. This technology helps the GPU control the refresh rate of the screen. You should avoid buying non-G-Sync monitors if you’re a gamer. But keep in mind that G-Sync monitors usually cost more than non-G-Sync ones, and the difference is not as large as it used to be.
Follow This Steps:
- Right-click on your desktop.
- Select the NVIDIA Control Panel.
- Expand the object displayed in the sidebar.
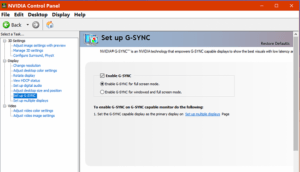
- Click Set G Sync.
- Check the box next to Enable G-Sync.
- Below this select whether you want G-Sync enabled on full screen or full screen and window modes.
In addition to reducing input lag, G-Sync eliminates screen tearing. It also minimizes display stutter. You must also make sure that your laptop supports the standard DisplayPort cable to enable G-Sync. Navigate to the NVIDIA Control Panel and click on Display. There, click on Set up G-Sync and then choose “G-Sync Compatible.”
Leave a Reply