How to Enable Flash in Google Chrome
Enable Flash Chrome Most websites have stopped using Adobe Flash player, as it is prone to security vulnerabilities. However, some sites still need it to function properly.
Google Chrome 76 disables Adobe Flash by default, but you can enable it manually. This guide will show you how to do so. It will also explain how to change your settings so that sites always ask before running Flash content.
Enabling Flash in Google Chrome involves a series of steps due to the browser’s default settings and the evolving web standards that have moved away from Flash. As of my last knowledge update in January 2022, Flash has been deprecated and is no longer supported by major web browsers, including Google Chrome. However, I’ll provide you with information on how Flash used to be enabled before its deprecation, and if there have been any changes or updates after my last knowledge update, you may need to check the latest information.
Before proceeding: Keep in mind that using Flash is not recommended due to security concerns and the discontinuation of support. If possible, consider using alternatives or updating your content to use modern web standards like HTML5.
Now, let’s discuss the steps for enabling Flash in Google Chrome:
Step 1: Verify Flash is Installed
- Open Google Chrome and type
chrome://components/in the address bar. - Look for “Adobe Flash Player” in the list of components.
- If you see it, Flash is installed; if not, download and install the latest version from the official Adobe Flash Player website.
2: Check Chrome’s Flash Settings
- Open Google Chrome and type
chrome://settings/content/flashin the address bar. - Make sure the toggle switch next to “Ask first” is turned on. This allows Chrome to prompt you before running Flash content.
3: Add Flash Exceptions (Optional)
- While in the Flash settings (
chrome://settings/content/flash), scroll down to the “Allow” section. - If you encounter a website where Flash is required, add its URL to the allowed list.
4: Enable Flash in Site Settings
- Navigate to the website where you want to enable Flash.
- Click on the padlock icon or “Not secure” in the address bar.
- In the dropdown, find “Flash” and select “Allow” from the options.
5: Use Chrome Flags (Advanced Users)
- Type
chrome://flagsin the address bar. - Look for “Enable Ephemeral Flash Permissions” and set it to “Disabled.”
- Restart Chrome for the changes to take effect.
6: Verify Flash Content
- Visit a website with Flash content to verify that it works.
- If prompted, allow Flash to run on the site.
Additional Tips:
- Keep your browser and Flash Player updated to the latest versions.
- Consider using alternative browsers that still support Flash, although support is diminishing across all major browsers.
Remember that the steps provided are based on the situation as of my last knowledge update in January 2022. For the latest information, check the official Google Chrome support pages or community forums. Additionally, it’s highly recommended to migrate away from Flash and use modern, secure web technologies.
1. Open Google Chrome
Google Chrome is a web browser that can open multiple webpages simultaneously. It also allows you to customize its look and feel with themes and extensions. The program is free and is available for Windows, Mac OS X, and Linux.
Google has begun to disable Adobe Flash Player by default in its browser. It will stop supporting the software in 2020. However, some websites still use Flash and you may need to enable it if you want to play these videos or games.
You can enable Adobe Flash in Chrome by changing the browser settings. To do this, go to the Chrome menu and click the three dots. Then, select “Settings.” Click the “Content settings” option and scroll down to the “Privacy and security” section. Select “Ask first” to allow sites to run flash content. You can also set Chrome to block websites from running flash by default. This will prevent sites from using it to deliver malicious content to your computer. However, this option will also reduce the speed of the website and make it more difficult to navigate.
2. Go to Settings
In Chrome 76 and later, Adobe Flash Player has been disabled by default to prevent you from accidentally downloading viruses. However, it is still available if you want to enable it. The only way to enable it is by going into your settings. To open your settings, click the vertically aligned ellipsis in the top right corner of the browser window. A drop-down menu will appear. Click Settings, and you will be redirected to the Chrome settings page in a new tab.
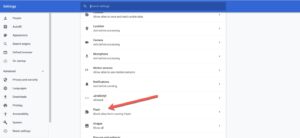
Once you’ve opened the settings, scroll down and click Content Settings. You’ll see a list of websites that have Adobe Flash enabled on them. You can also add or block sites from running Flash in the Content Settings menu.
If you’re having trouble playing your favorite videos, games or gifs on the web, try using Ruffle. This free Chrome extension works as a replacement for Adobe Flash and allows you to play all your favorite content across the web. It is safe and easy to use. It also protects your privacy by removing cookies from all the websites you visit, speeds up your Mac, deals with annoying extensions, shreds outdate personal files and frees up space.
3. Click on Content Settings
In Chrome, you can check if you have Flash enabled. To do so, type about:plugins in your omnibar or press Ctrl + F. You will see a list of plugins that are currently enabled or disabled in Chrome. It will show whether Adobe Flash Player is bundled with Chrome or if you downloaded it separately.
You can also open the Content Settings in Chrome’s browser menu. Then click on Site settings and find the Flash option. You can change the setting to Ask first or Allow. However, this will only allow sites that use Flash to run it on the page.
While the majority of websites are moving away from Adobe Flash, some still need it to display their content. This can include videos, games or whole websites. Fortunately, Chrome allows you to enable Flash on specific sites even though support for it ends in 2020. To do so, visit a website that uses Flash and click on the padlock in the URL bar to open the Site settings. Then, click the Flash icon and change the setting to Allow.
4. Click on Flash
Flash was once the foundation of the internet, used to run animations, browser games, and even advertisements. But as technology advanced, Flash started to fall out of favor. Now, Google Chrome blocks Flash content by default on any page you visit unless you explicitly allow it.
If you visit a website that uses Flash, you’ll see a “Plugin blocked” message in the address bar. You can click the plugin blocked message to get a pop-up that allows you to enable Flash. Once you enable Flash on a site, it should load normally.
However, you cannot reinstall Adobe’s Flash Player, which is now considered outdated and insecure. As of January 12, 2021, Adobe no longer supports it and it is no longer supported by major browsers. In order to play Flash content in Chrome, you can use a modern alternative called Ruffle. You can get it by visiting the Ruffle Chrome Web Store page and clicking “Add to Chrome.” When you install it, the browser will ask if you want to allow Flash on this site.
5. Click on Allow
Flash was once the foundation of the internet; it powered everything from videos to web games and ads. But it’s now falling out of favor, and Adobe has announced that it will stop updating it in 2020. As a result, Chrome has begun blocking Flash content by default.
However, some websites still use it. If you want to visit these sites, you’ll need to enable Flash in Chrome. This is a quick and easy process.
To do so, type chrome://settings/content/flash into your browser’s address bar and select “Ask to activate.” This will change the setting so that Chrome will ask you whether or not to run Flash on a particular page.
Interested in other ways to speed up and clean up your computer? Try out CleanMyMac X. This powerful program scans every inch of your Mac, removes all the junk and malware, makes it fast again, deals with useless apps and extensions, shreds outdate personal files and frees up space. Plus, it helps you protect your privacy and maintains online security. It’s the perfect solution for your Mac!
Leave a Reply