How to Activate Chrome OS Developer Mode
Activate Chrome OS Developer Mode is a powerful tool that allows users to access additional features and functionality. However, it can also make the device less secure and may cause data loss. It is therefore recommended that you only use it if you are comfortable with the risks involved.
Enabling developer mode on a chrome book gives the user a lot more freedom and can be used for things like side loading apps or even installing an alternative operating system. However, it comes with some serious risks and will void the warranty on the device.
Activating Developer Mode on Chrome OS allows users to access advanced features and install custom firmware on their Chromebooks. However, it’s important to note that enabling Developer Mode will wipe all local data on the device. Proceed with caution and back up important data before following these steps.
Step 1: Understanding Developer Mode
Before diving into the process, it’s crucial to understand what Developer Mode is and its implications. Developer Mode allows users to make changes to the Chrome OS system, install custom firmware, and have greater control over the device. However, it also increases the risk of security vulnerabilities and potential data loss.
2: Backup Important Data
Enabling Developer Mode will wipe all local data on the Chromebook. Ensure that you have backed up essential files and data to an external drive or cloud storage.
3: Put the Chromebook in Recovery Mode
To start the process, turn off the Chromebook. Once it’s off, hold down the “Esc” and “Refresh” keys simultaneously, and then press the power button. This will put the Chromebook in Recovery Mode.
4: Enable Developer Mode
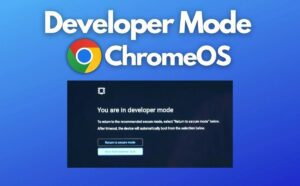
In Recovery Mode, you’ll see a screen with a warning about Chrome OS being missing or damaged. Ignore this warning and press “Ctrl + D” to enter Developer Mode. The system will prompt you to confirm; press “Enter.”
5: Wait for the Chromebook to Transition
The Chromebook will transition to Developer Mode, and this may take some time. It will show a screen with a spinning cog, and then it will transition to the OS verification is OFF screen.
6: Set Up the Chromebook in Developer Mode
Once in Developer Mode, the Chromebook will boot up as if it were a new device. Follow the on-screen instructions to set up the device. Note that some settings may be different in Developer Mode.
7: Access the Developer Mode Shell
After the initial setup, you can press “Ctrl + Alt + T” to open the Chrome OS terminal. In the terminal, type “shell” to access the Developer Mode shell.
8: Install Crouton (Optional)
If you want to run Linux alongside Chrome OS, you can use a tool called Crouton. Follow the instructions on the Crouton GitHub page to install it. This step is optional and depends on your preferences.
9: Return to Normal Mode (Optional)
If you ever want to return to normal mode, you can do so by turning off Developer Mode. To do this, you’ll need to power off the Chromebook, press “Esc + Refresh + Power” to enter Recovery Mode, and then press “Ctrl + D” to turn off Developer Mode.
10: Developer Mode Tips
- Keep in mind that Chrome OS updates might disable Developer Mode, requiring you to repeat the process.
- Be cautious when using Developer Mode, as it increases the risk of security vulnerabilities.
- Always check the official Chrome OS documentation for any updates or changes to the process.
In conclusion, activating Developer Mode on Chrome OS opens up a range of possibilities for customization and experimentation. However, it comes with risks, so make sure to follow the steps carefully and be aware of the potential consequences.
How to enable developer mode
Developer Mode allows advanced users to make a variety of modifications to their Chromebook. This includes accessing the command line interface, installing Linux applications and making changes to the underlying system files. It also enables users to bypass restrictions that Google places on its devices and gives them greater flexibility than is possible with a standard Chromebook.
To enable developer mode, you need to restart your device and press the Esc + Refresh keys at the same time. The refresh key looks like a circular arrow pointing in a clockwise direction and is usually the fourth key from left on the top row of keys on a keyboard. After pressing these keys, you’ll see a screen that says “Chrome OS is missing or damaged”, but don’t worry – this is normal. To proceed, you need to press the Spacebar and follow the on-screen instructions.
Activate Chrome OS Developer Mode will erase all data on your Chromebook, so you should back up any important information before proceeding. It will also void your warranty and make the device more vulnerable to malware attacks. For these reasons, it is only recommended for experienced users who understand the risks. If you don’t feel comfortable, you can avoid the risk by turning off the developer mode when you’re done using your device. By doing this, you’ll remove the rootfs verification and re-enable read-only mode.
Benefits
Activating developer mode opens up a world of possibilities for advanced Chromebook users. It gives them access to the underlying operating system, which allows them to personalize their device with apps and extensions that aren’t available in the Play Store. It also allows them to install Linux applications on their devices, which expands the software capabilities of the device. This is especially useful for developers who use powerful IDEs (Integrated Development Environments) that provide features like code highlighting and debugging capabilities.
The downside is that enabling developer mode will void the warranty on most Chromebook models, and it can cause data loss. It also removes security features that prevent malware from running on the device, which could lead to a compromised security situation. It’s important to be aware of these risks before proceeding with the process, and it’s a good idea to make regular backups of your data.
The key to avoiding these risks is knowing when to disable developer mode. Most Chromebook devices will display the message “OS verification is off” when the mode is enabled, and it’s easy to turn off if you don’t need to use it again. This way, you’ll avoid losing your data and keeping the Chromebook in a vulnerable state. It’s important to remember that any changes you make to the OS will be unsupported by Google, so they aren’t recommended for everyday use.
Risks
While enabling developer mode can give you more freedom with your Chromebook, it also comes with risks. For one, it disables security features that protect devices from malicious actors. This can make your device vulnerable to attack and lead to data loss. Additionally, USB debugging is enabled in Developer Mode, which can allow hackers to access your device and install apps that steal personal information. In addition, enabling developer mode can cause your device to run slower, as it requires the use of advanced commands that are not familiar to most users.
Finally, enabling developer mode can also void warranties, which is a major concern for business users who depend on warranty coverage. Additionally, the complexity of the developer options can be overwhelming for less tech-savvy users, leading to mistakes that result in data loss or other problems.
Activate Chrome OS Developer Mode isn’t for everyone, but it can be useful for those who want to tweak their Chromebook or gain root access. It is important to note, however, that enabling developer mode will wipe all locally stored data and cannot be restored. It is also important to make regular backups of your device. Additionally, it is important to keep in mind that if you are using a public computer or are sharing your Chromebook with others, you could potentially lose your data if they press the spacebar at boot time.
Conclusions
Developer Mode allows users to make advanced changes to their Chromebooks, including installing Linux applications and accessing the command line interface. However, it is not for the average user and can void the device’s warranty if misused. Additionally, it can also cause data loss and other problems. Therefore, it is best to avoid enabling Developer Mode unless you are comfortable with the risks involved.
To enable Developer Mode, you must first power off your Chromebook and press and hold the Esc and Refresh keys. After a few seconds, you will see a screen with a yellow exclamation point. Then, press Ctrl + D to turn on Developer Mode.
Once you have enabled Developer Mode, you will need to back up any important files that are stored on the device. This is because enabling Developer Mode wipes all locally stored data and cannot be restored. It is similar to factory resetting your Chromebook.
It is also important to note that enabling Developer Mode on a school-issued Chromebook may violate your school’s acceptable use policies. This is because modifying or tampering with school-issued devices without proper authorization can lead to privacy violations and other issues. In addition, it may also expose students to potential malware and viruses. If you are using a school-issued Chromebook and wish to disable Developer Mode, you must perform a complete reset on the device (also known as “Powerwashing”). This process can take several minutes to complete, but it will restore the original state of the machine.
Leave a Reply