How to Enable Debugging in WordPress
You may have heard about enable debugging in WordPress, but aren’t sure how to turn it on. It’s a simple process that will force your WordPress site to use the dev versions of CSS and JavaScript. Having this enabled will allow you to check for errors without bothering your visitors. To enable this feature, you must use the wp-cli command. This command will require that you log into your server as the user you want to run the commands as.
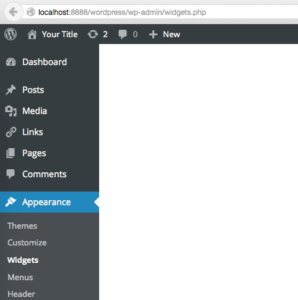
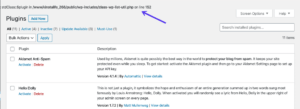
In order to enable debugging in WordPress, you must first open the code that enables debugging. These files are usually located in the public_html folder. However, it can be difficult to find these files if you’re working on a website that’s using a plugin. Another solution is to install a WordPress debugging plugin to take care of these issues for you. The WP Debugging plugin is a good choice Google.
When you’re creating a website with WordPress, you can enable debugging by changing the WP_DEBUG variable. This setting will enable PHP error messages, and show any warnings and errors that are displayed. Once the problem has been solved, you can proceed to coding. This method can speed up the troubleshooting process and make it easier to understand your WordPress code. It’s a useful option for web designers and coders alike.
How Do I Enable Debug In WordPress Debugging:
When you’re working on a WordPress website, you’ll encounter problems that take hours to solve. Using debugging, you can locate and fix the problem before it gets worse. If you’re unsure of what’s causing the problem, you can use debugging mode to see the details. This feature is extremely helpful for troubleshooting, so be sure to enable it.
While debugging is generally a useful feature for developers, it’s also a valuable tool for beginners. Using debugging, you can monitor and fix problems with your site. A WordPress developer can use the plugin debugging menu to see information about queries and caches on a live page. Alternatively, you can enable the plugin to display the debug log. These three options can be useful for you to diagnose potential problems with your website.
How Do I Turn On Debugging Mode In WordPress:
Using debugging in WordPress is a vitally important tool for developers. By using this feature, you can find out what is causing errors and resolve them more efficiently. It’s very helpful for identifying issues before launching a site. By enabling debugging in WordPress, you can avoid costly and time-consuming mistakes. You can save the time of your customers by fixing issues. The process is quick and hassle-free.
In order to enable debugging in WordPress, you must first set up your website. This is an essential step if you want to ensure the security of your site. The debugging tools will display PHP errors and warnings on the screen and help you find out which code is causing the problem. Then, you can resolve the issue by adjusting the configuration of the plugin. If you don’t have the right plugin or theme, you’ll need to change the settings of the WordPress file.
How Do I Disable Debugging In WordPress:
Debugging in WordPress is crucial for improving the performance of your site. The debugging process will help you to identify issues in your site and resolve them before they get out into the world. By allowing debugging in your WordPress site, you’ll be able to track any errors and improve its functionality. In addition to that, you’ll be able to save the variables and arrays used in the query.
You can also enable debugging in WordPress by specifying SCRIPT_DEBUG. This will force WordPress to use the debug versions of core files. This is very useful if you’re making modifications to the built-in files. You can also use the SAVEQUERIES definition to save database queries to an array for analysis. The data that is stored in this variable will be saved in global $wpdb->queries.
Enabling DEBUG Mode:
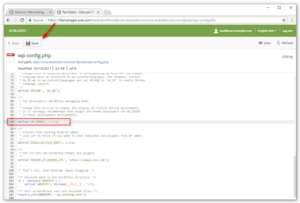
- Log in to your server via SSH or FTP.
- Edit the wp-config file.
- PHP using SSH or your FTP client.
- Near the bottom of the file you will see the following: define (‘WP_DEBUG’, false);
- Correct that line in three lines: …
- If an error is thrown into WordPress.
- It will write to a file entitled debug. log.
When you use WordPress, you should enable debugging by default. It will make your site much faster and can help you troubleshoot software errors. Besides, debugging will allow you to see which files and functions are being abused and which are not. If you don’t want to see this, it will be impossible to use it on your live site. You should only enable it temporarily and for critical tasks like rewriting a plugin.
Leave a Reply