
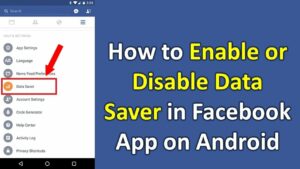
How to Enable Data Saver in Facebook
If you have a mobile phone that’s running out of space, enable data saver in Facebook you might want to turn on data saver in Facebook. This tool, which can save hundreds of MB a day, is available in the Facebook app. It can be turned on automatically or disabled at any time. This tool can also be useful if you want to download more pictures or videos, or if you’re on a budget.
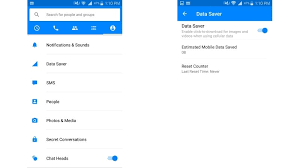
When you use your smartphone, Facebook users should enable Data Saver, a handy tool that reduces the amount of data they use. You can enable Data Saver in the app’s Settings & Privacy menu. Then, tap the toggle in the top-right corner of the screen to enable the data saving feature. If you don’t need the data-saving feature, you can disable it manually whenever you want Google.
Fortunately, this feature is completely optional and can be turned on and off on different devices. On the iPhone SE, tap the profile icon located in the lower right corner, followed by the gearwheel. Tap the Media & Contacts section and select “Videos & Photos.”
How To Enable Data Saver In Wi-Fi Assist:
If you use Wi-Fi Assist in Facebook, you can connect to any WiFi network without bothering the network administrator or logging in with a password. This feature can be enabled in your account settings or by manually launching the web browser. Once you have connected, the Wi-Fi authentication page will be displayed. Once you have authenticated with Facebook, you can continue browsing normally. If not, you can manually log in with your Facebook account.
First, open the Facebook app. Look for the three-line menu button. On the bottom, tap on “Find Wi-Fi.” This will show details of available hotspots near you. Tap on “Find Wi-Fi” to find more information. Once you have the details, tap on “Connect” and follow the instructions. If you don’t see any information on the screen, you can always try wiping your local data and reinstalling the app.
How To Enable Data Saver In Optimized Mode:
Using Optimized mode for your Facebook advertising campaign will ensure that you’re serving your ads to the types of people who are most likely to take action. With this option, you can change the layout of your tabs and adjust the content on your page. Optimizing your Facebook page is the best way to increase brand visibility and loyalty, and you’ll get the most out of this feature. It also enables you to tweak several aspects of your business, from third-party scheduling apps to integration with messaging apps. There are dozens of hidden features on Facebook that can be used to optimize your page for maximum ROI.
The first and most obvious change to make when switching from learning limited to active is to change your optimization event. Instead of focusing on add-to-carts, try focusing on purchases. The quality of add-to-cart visitors will be lower than those who purchase. In addition, a new optimization event will be created for your Facebook business page, so be sure to switch to that one if you haven’t done so already.
How To Enable Data Saver In Disabled Mode:
Facebook has a feature called Data Saver. If you want to save data while using Facebook, you can enable this feature automatically. By doing this, you can save hundreds of MB of data. You can also disable videos from playing automatically. It can be quite frustrating to run out of data before you can even view a video on Facebook. But the good news is that you can turn off the data saver and still enjoy quality content.
Data Saver In The Settings:
- Scroll to the bottom of Facebook and tap Settings & Privacy.
- Under Preferences, click Media.
- Tap to select Less, Normal or More and tap Save.
Disabling Facebook’s data saver is fairly simple. To do so, open the Facebook app. On the top right-hand corner, tap the settings icon. From there, tap on Privacy. Tap on the data saver toggle. Uncheck it to turn off data saving on Wi-Fi. You can also turn off the data saver in Facebook for your browser. Once you do that, you can resume browsing Facebook.
Leave a Reply