
How to Enable XMP in Windows 10
Enable XMP Windows 10 you have a gaming computer or work with demanding programs and AAA games, chances are your PC doesn’t use its RAM to its full potential. Enabling XMP, which stands for Extreme Memory Profile, will allow you to run your RAM at the advertised speed.
First, you will want to check your existing clock speed by heading into Task Manager (click More Details to expand it). You can also look at the BIOS/UEFI menu.
Enable XMP Windows 10 is a straightforward process, but it involves adjusting settings in your computer’s BIOS/UEFI. XMP is a feature that allows your system to automatically configure your RAM modules to run at their maximum supported frequency, providing better performance. Here’s a comprehensive guide on how to enable XMP in Windows 10:
1. Check Hardware Compatibility:
Ensure that your motherboard and RAM modules support XMP. Most modern motherboards and DDR4 RAM modules do, but it’s always good to check the specifications on the manufacturer’s website.
2. Accessing BIOS/UEFI:
- Restart your computer.
- During the boot process, press the appropriate key to access the BIOS/UEFI. This key varies by motherboard manufacturer but is typically one of the following: Del, Esc, F1, F2, F10, F12. Refer to your motherboard manual or watch the screen during boot for the correct key.
3. Navigate to the BIOS/UEFI:
- Use arrow keys to navigate within the BIOS/UEFI interface.
- Look for an option related to “Advanced” or “Overclocking.” It might also be in a section like “DRAM Configuration” or “Memory Settings.”
4. Locate XMP Settings:
- Find the setting related to XMP. It may be named differently depending on your motherboard manufacturer, such as “XMP Profile,” “Memory Profile,” or “DOCP” (Direct Overclock Profile).
5. Enable XMP:
- Once you’ve located the XMP setting, change it from “Disabled” to “Enabled” or select the specific XMP profile (Profile 1 or Profile 2).
6. Save Changes:
- After enabling XMP, navigate to the “Save & Exit” or a similar section.
- Confirm and save changes. Your computer will restart.
7. Check Stability:
- After rebooting, check if your system is stable. If you encounter any issues, such as crashes or boot failures, go back to the BIOS/UEFI and try a lower XMP profile or adjust other relevant settings.
8. Verify XMP Activation:
- Once back in Windows, verify that XMP is activated. You can use software tools like CPU-Z or HWiNFO to check the RAM frequency and timings. The memory tab in these tools should display the updated values based on the XMP profile.
9. Troubleshooting:
- If your system becomes unstable after enabling XMP, you may need to tweak settings manually. In the BIOS/UEFI, you can adjust parameters like DRAM frequency, timings, and voltage. Consult your motherboard manual for guidance.
10. Regularly Update BIOS/UEFI:
- Ensure that your motherboard’s BIOS/UEFI is up-to-date. Manufacturers release updates that may improve system stability and compatibility with XMP.
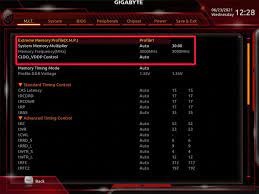
1. Go to the BIOS
XMP, short for Extreme Memory Profiles, allows you to run your RAM at the advertised speed without having to manually set the timings, voltage and frequency. XMP is supported by almost all manufacturers of RAM, so it’s a great way to get the most out of your hardware without spending extra.
To enable XMP, you’ll need to go into the BIOS/UEFI of your computer and find the XMP option. This will be somewhere on the main settings screen or hidden behind a more advanced section depending on the motherboard manufacturer. Once you’ve found it, navigate to it and select ‘EZ’ mode. In the EZ mode, you’ll see a drop-down with just two options; ‘Enable’ and ‘Load XMP Settings.’ Select ‘Load XMP Setting,’ and then select the profile that matches your RAM (usually ‘Profile 1’).
You can also check if your RAM supports XMP by downloading and running CPU-Z, which will display your current RAM’s configuration in its SPD tab. You can then compare the timings against the ones that are advertised by the manufacturer to ensure that XMP is enabled.
2. Go to the Tweaker/Ai Tweaker
XMP, or Extreme Memory Profile, allows you to run your RAM at its advertised speed. It’s a feature that’s disabled by default in most BIOSes, but it can be enabled to give you faster speeds.
Typically, you’ll need to go into the BIOS or UEFI to enable XMP. To do this, reboot your PC and look for a message asking you to press a key to enter the BIOS, which is usually the delete or escape key or one of the function keys like F2, F10, or F12 depending on your motherboard manufacturer.
Once in the BIOS, look for the ‘Tweaker/Ai Tweaker’ or ‘Advanced Settings/Mode’ tab, and then find where it says “XMP”. You should see a setting there with a toggle switch that you can bring to the “On” position. Enabling XMP is safe and should not void your warranty. It can help give you a boost in performance without risking any damage to your computer components. If you’re a regular joey who just uses the computer for web browsing, productivity work, and the occasional game, it’s probably not necessary, but if you’re a hardcore gamer or someone who does high-res video editing, this can be a great way to unlock some extra performance.
3. Go to the Advanced Menu or Mode
With newer PC games getting more demanding, it’s understandable that you want your hardware to work at its advertised speed. One way to do this is by enabling the XMP setting in your BIOS/UEFI. XMP stands for Extreme Memory Profiles and allows you to change the RAM timings in order to obtain the advertised speeds.
To enable XMP, you must first boot into your UEFI/BIOS and access it through a key combo (typically Del or F2, though this can vary). Once in the BIOS, look for the ‘XMP’ settings. This can be found on the home screen of the UEFI/BIOS, or on the Tweaker page in the Advanced menu.
Once you find the ‘XMP’ settings, toggle it to ‘On’. This will enable the XMP settings, and your RAM will now run at the specified frequency, timings, and voltage. You can check this by running a program like CPU Z to see if your memory is now running at its advertised speed. If not, try changing the RAM timings and see if that helps. If not, the problem may lie in the motherboard or BIOS and you’ll have to contact your manufacturer.
4. Go to the Tweaker/Ai Overclock Tuner
XMP is a way to enable your RAM’s rated clock speed without overclocking it. This is especially useful for PC gamers who want to squeeze as much performance out of their hardware as possible, or those who use programs that have high CPU requirements. It also helps avoid the potential for damage to your memory or motherboard caused by manually overclocking it.
To enable XMP, boot into your system’s BIOS/UEFI. Typical access keys include Del and F2, though your BIOS/UEFI’s access method may vary. Once in your BIOS/UEFI, navigate to the Tweaker or Overclocking settings (names vary by motherboard manufacturer).
Find the XMP toggle and bring it to the “On” position. Save your changes and exit the BIOS/UEFI. Once you’re in Windows, verify that XMP is enabled by checking your computer’s RAM speed using a program like CPU Z. It should be the same speed as if it were overclocked by hand. Note that enabling XMP will increase your CPU temperature slightly, but this shouldn’t be significant. The XMP setting will not void your motherboard or processor warranty, but it does put you in a gray area with respect to Intel’s CPU warranties.
5. Go to the XMP Settings
If your RAM supports XMP or Extreme Memory Profiles, you will be able to enable it in your UEFI/BIOS. Essentially, XMP allows your motherboard and CPU to set up your RAM correctly so it can run at speeds that are beyond standard DDR industry specifications. This is technically overclocking, but it shouldn’t affect the longevity of your hardware and is a safe way to push your system hardware.
To do so, you will need to go into the BIOS (F7 or F2 depending on your motherboard) and find the XMP tab. There should be a big button that you can click on to enable the profiles. If this is not available, you may need to manually set the timings and voltage yourself using a tool like CPU-Z or even by visiting your motherboard manufacturer’s support website for a manual. Once you have selected the appropriate XMP profile, press F10 to save and reboot into Windows. You should then be able to see the faster clock speed in Task Manager if you have correctly enabled XMP.
Leave a Reply