
How to Enable or Disable Intel Turbo Boost in Windows 10
When you enable turbo boost windows 10 , you’ll probably notice an option for Intel Turbo Boost Technology, but what is it? How do you enable it? In this article, I’ll walk you through the steps to enable or disable the feature. Once you’ve done that, reboot your PC to re-enable Turbo Boost. To disable Turbo Boost, disable it in the BIOS, Pcode, or Hardware.
Disabling Intel Turbo Boost in Windows 10 has many benefits. It can improve performance, improve battery life, and reduce power consumption. However, if you want to turn off this feature, you must know what it is, and how to disable it. Fortunately, these steps are easy and can be reverted if you don’t want to use it. To disable Intel Turbo Boost in Windows 10, open your BIOS settings and go to “General” > “Intel Turbo Boost Google.”
Generally, Intel Turbo Boost is enabled by default, and you can disable it in the BIOS. You must restart your computer to make the changes. Alternatively, you can disable Turbo Boost in the Advanced Power Management option in the BIOS. However, this will require a BIOS update. If you’re using a newer PC, you can disable Intel Turbo Boost in Windows 10 manually by following the instructions provided by the manufacturer.
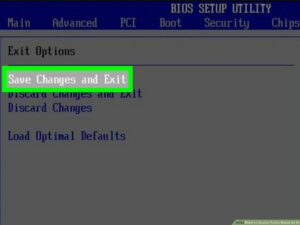
How To Disable Intel Turbo Boost In BIOS:
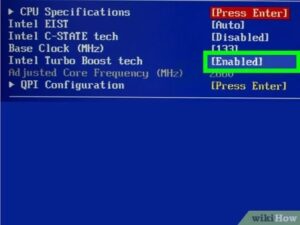
To turn off Intel Turbo Boost, open the BIOS of your computer. You will likely find the option labeled Enabled or Disabled. Click on the Enabled or Disabled option and restart the PC. It should now be enabled. To enable or disable Intel Turbo Boost in BIOS for Windows 10, select the corresponding option under the Power Options tab in the BIOS.
You can also disable Intel Turbo Boost manually by visiting your BIOS and checking for the “Intel Turbo Boost” option. This option is generally enabled by default. For additional information, contact your motherboard’s manufacturer for detailed instructions. Then, follow the instructions to disable the Intel Turbo Boost technology. This should prevent your PC from causing any damage to your system. In this way, you will get the most out of your machine’s performance.
How To Disable Intel Turbo Boost In Code:
If you have a modern laptop, it is probably not able to cope with the additional heat generated by Turbo Boost. Disabling this technology will help your computer run cooler, extend battery life, and increase efficiency. Disabling Intel Turbo Boost in BIOS will help you maintain a cooler operating system and improve your laptop’s performance. This can also prevent heat throttling and overheating and help your system last longer.
If you want to disable Intel Turbo Boost, you need to modify the powercfg attributes. It is possible to disable Turbo Boost by changing the p-code. This way, the operating system will learn about it and re-enable it. Disabling Intel Turbo Boost in Pcode can be a good solution to battery life concerns. The problem with Turbo Boost is that it increases the temperature, which can significantly affect battery life.
How To Disable Intel Turbo Boost In Hardware:
You cannot disable Intel Turbo Boost by core, but you can disable it by processor. Normally, the processor turns on this feature when it is loaded. It automatically adjusts its voltage to its highest frequency. For moderate over clockers, leaving it alone is enough. But if you want to disable it completely, you should use a program that will turn it off for you. You can download a free version of this software from the internet.
One of the first steps in disabling Turbo Boost is to force-quit all applications that use it. This will disable the feature and prevent overheating. Afterward, you can turn off the feature if you want. The reason why many people choose to disable the feature is because they are annoyed by the frequent system reboots. However, you may want to enable Turbo Boost if you’re having problems with performance.
Screen Select System Configuration:
- On the System Utilities screen,
- Select System Configuration > BIOS/Platform Configuration (RBSU) > Performance Options > Intel (R)
- Turbo Boost Technology and press Enter. Select a setting and press Enter.
- Enabled – Enables logical processor cores on processors supporting hyperthreading technology.
To disable Intel Turbo Boost, either press F10 or open Control Panel. From here, select Advanced power settings and find Processor power management. Make sure that the On battery and connected is set to 99 percent. Also, make sure that you’ve enabled the setting for the Maximum processor state. This will disable the Turbo Boost feature on your system. If you’re still experiencing problems, check your motherboard’s manual for instructions.
Leave a Reply