
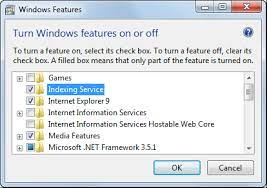
How to Enable Microsoft Indexing Service on Windows 10
Enable Microsoft Indexing Service files and folders on a Windows computer makes it faster to search file contents. The Indexing Options menu allows you to modify which drives and folders should be indexed, which file types (extensions), and file properties.
Many Microsoft programs and apps rely on indexed data to provide fast results when searching for files, folders, and other PC content. Disabling it can cause them to take longer to return search results.
Enabling Microsoft Indexing Service is a useful way to enhance search capabilities on your system. It helps in quickly finding files and content across your computer or network. Here’s a step-by-step guide on how to enable Microsoft Indexing Service:
Understanding Microsoft Indexing Service
Microsoft Indexing Service, also known as Indexing Service, catalogs the content and properties of files on your system, creating an index to facilitate faster searches. To enable it:
Step 1: Open Control Panel
Navigate to the Control Panel on your Windows system. You can access it by clicking on the Start menu and typing “Control Panel” in the search bar or finding it in the list of applications.
Step 2: Administrative Tools
In the Control Panel, locate and click on “Administrative Tools.” This section contains various system management tools.
Step 3: Services
In the Administrative Tools, find and click on “Services.” This section lists all the services running on your system.
Step 4: Locate Indexing Service
Scroll through the list of services until you find “Indexing Service” or “Windows Search” (depending on your Windows version). Double-click on it to open its properties.
Step 5: Startup Type
In the properties window, you’ll find the “Startup type” dropdown menu. Click on it and select “Automatic” from the list. This ensures that the Indexing Service starts automatically when you boot up your computer.
Step 6: Start the Service
Click on the “Start” button in the properties window. This will initiate the Indexing Service. You can also restart the service if it’s already running but encountering issues.
Step 7: Configure Indexing Options
After enabling the service, you may want to configure the indexing options to specify which locations or types of files to index. To do this:
- Open “Indexing Options” in the Control Panel.
- Click on “Modify” to choose specific folders, drives, or file types for indexing.
- You can also customize advanced settings like file properties to include or exclude from indexing.
Step 8: Monitor Indexing Progress
Once configured, the Indexing Service will start building the index. You can monitor the progress by going back to “Indexing Options” in the Control Panel. The status will show the number of items indexed and pending.
Step 9: Utilize Search
With Indexing Service enabled and the index built, you can now utilize the enhanced search functionality in Windows. Use the search bar in File Explorer or the Start menu to search for files, and the Indexing Service will provide faster and more accurate results.
Troubleshooting Tips:
- Performance Consideration: Indexing can consume system resources, especially during the initial indexing process. Consider scheduling indexing during off-peak hours if you experience performance issues.
- Indexing Errors: If you encounter errors during indexing, check the event logs or try rebuilding the index from scratch to resolve issues.
How to Enable Indexing Service
The indexing feature on Windows 10 aims to make it faster and easier to search for files by creating an index, or catalog, of the items on your PC. When the feature is enabled, your PC will scan all of the files on a drive or partition and create an index that can be searched using the search function.
Typically, the index contains file information such as the file name and location on the hard disk. However, the contents of text in files are also indexed to allow searches based on the words found within them. Apps can also add their own data to the index to speed searches that pertain to them.
To turn on the feature, open Start and type “indexing options.” When the Indexing Options window opens, click the Modify button to select which folders and drives you want to index. You can disable indexing for areas where you don’t frequently use search to save CPU and RAM resources as well as reduce storage strain.
Disable Indexing Service
Indexing is useful if you want to find files or other content on your PC quickly, but it can also take up valuable system resources. You can disable search indexing on your hard drive to free up memory and improve performance.
To do this, press the Windows logo key and R to open Run, type control panel, then click the top result. In the Control Panel window, select Large icons from the View By drop-down menu and then click Indexing Options.
In the Indexing Options window, select your hard drive (usually C:) and then clear the Allow files on this drive to have context indexed in addition to file properties check box. Click OK to save the changes.
Troubleshoot Indexing Issues
If indexing is causing your computer to run high on CPU and RAM, try disabling the feature. This can be done in a few different ways. For example, you can open File Explorer, right-click on a mapped network drive, and select the properties command. Then, uncheck the Allow files on this drive to have contents indexed option.
The –checkstore command detects and corrects inconsistencies in the dIndex and in the account group index directories (meta and content). Some checks complete with little or no impact on system performance, while others are more resource intensive.
If a problem with the dIndex is detected, significant intervention might be required to recover. Recovery methods depend on where the corruption occurred. For example, if corruption is limited to accounts, you can bootstrap those accounts into another group to restore their data. However, if the Index is corrupted across groups, it might require a complete rebuild of the index store to recover. Google
Restart Indexing Service
If you’ve spotted the “Indexing has been paused” message in Windows settings you can easily resume indexing. The index is a hidden file that contains pointers to other files keyed by search terms (plain text words, usually part of the file name). When indexing is enabled Windows keeps track of new and deleted files, app installs and uninstalls, and new downloads. This can take a lot of processing power and slow down your system.
To re-enable Windows search indexing, open Command Prompt and run the command net start wsearch to restart the service. The index will be rebuilt and you’ll have full search functionality again. Rebuilding can take a while depending on how many files you have on your computer. If you want to speed things up, disable indexing for a folder or application in Control Panel and Indexing Options. You can also delete the index files in your TxR folder to save space. Just make sure to backup these files first!
Conclusion
Enabling Microsoft Indexing Service enhances your system’s search capabilities, enabling faster and more accurate file searches. Configuring and managing the service allows you to customize the indexing process based on your preferences and needs. Regularly monitoring the indexing progress ensures the index stays up-to-date, providing efficient search results.
Leave a Reply