
How To Enable Cellular Data On Android
Enable cellular data on Android device is a necessary step to access the internet when you’re not connected to a Wi-Fi network. If you’re new to Android, or you’re having trouble enabling cellular data, here’s a step-by-step guide on how to do it.
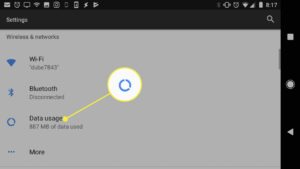
Step 1: Access Settings
The first step to enabling cellular data on an Android device is to access the settings menu. Depending on the make and model of your device, this may be located in different places. Typically, you can access the settings menu by swiping down from the top of the screen and tapping the gear icon in the top right corner.
Step 2: Tap on “Network and Internet”
Once you’re in the settings menu, look for the option that says “Network and Internet.” This may be located in different places depending on your device and the version of Android you’re running. If you’re having trouble finding it, you can use the search function in the settings menu to locate it quickly.
Step 3: Tap on “Mobile Network”
Once you’re in the “Network and Internet” section, look for an option that says “Mobile Network” or “Cellular Network.” Tap on this option to access the settings for your cellular data connection. Google
Step 4: Enable Cellular Data
In the “Mobile Network” settings, you should see an option to enable cellular data. This may be labeled differently depending on your device, but it will usually be a switch that you can turn on or off. Make sure that the switch is turned on to enable cellular data.
Step 5: Set Your APN
If you’re having trouble accessing the internet with cellular data, you may need to set your Access Point Name (APN). This is a set of parameters that your device uses to connect to your mobile network provider’s internet service. To set your APN, go to the “Mobile Network” settings and look for an option that says “Access Point Names” or “APN.” Tap on this option to view and edit your APN settings.
Step 6: Add or Edit Your APN Settings
In the APN settings, you should see a list of available APNs. If you don’t see your provider’s APN in the list, you may need to add it manually. To add a new APN, tap on the plus sign (+) or “Add” button and enter the required information, which should be available from your mobile network provider.If you see your provider’s APN in the list, tap on it to edit its settings.
Step 7: Save Your APN Settings
Once you’ve entered or edited your APN settings, make sure to save them by tapping on the “Save” button or the checkmark icon. You may need to restart your device for the changes to take effect.
Step 8: Test Your Connection
Once you’ve enabled cellular data and set your APN, you can test your internet connection by opening a web browser or using an app that requires an internet connection. If you’re still having trouble connecting to the internet, you may need to troubleshoot your device or contact your mobile network provider for assistance.
In summary, enabling cellular data on an Android device involves accessing the settings menu, navigating to the “Network and Internet” section, enabling cellular data, setting your APN, and testing your connection. With these steps, you should be able to access the internet with your mobile data connection on your Android device.
Leave a Reply