
How to Enable IPv6 on Android
Enable IPv6 on Android IPv6 is an advanced networking standard that provides a much larger number of unique IP addresses than the older version (IPv4). This allows devices to communicate and transfer data more easily.
Currently, there are just over 4 billion possible IPv4 addresses to serve the entire internet. That’s not enough to accommodate the increasing influx of people and devices connecting to the internet.
What is IPv6?
IPv6 is the next-generation Internet Protocol that enables data communications over a packet switched network. It offers better security, reliability and faster speeds than IPv4.
To be more specific, an IPv6 address uses 128 bits, four times the address used by IPv4. These 128 bits are represented in 8 groups of 16 bits each with hexadecimal numbers.
Each group of hexadecimal numbers is separated by colons (:). This allows the address to be written using hexadecimal instead of dotted decimal as in IPv4.
The most important difference between IPv6 and IPv4 is that the former supports both manual, DHCP and auto-configuration. This is a huge advantage for network administrators as it lets devices automatically configure themselves when they connect to each other.
In addition, the former does not require network address translation (NAT), enabling faster and more direct data transfer. This is also a significant benefit for mobile devices, which will now be able to maintain their address when switching between Wi-Fi networks and 3G connections. Google
Why should I enable IPv6?
IPv6 is the latest iteration of Internet Protocol and was developed to address the dwindling supply of public IPv4 addresses. There are only about 3.7 billion public IPv4 addresses, which isn’t enough to meet the demand for all of the devices on the planet that need to connect to the Internet.
IPv6 works by assigning each device on the network a unique, alphanumerical IP address. This ensures that no two devices have the same IP address, which helps to increase security and improve connectivity.
Aside from helping the Internet maintain its integrity, IPv6 also makes it possible for devices to stay connected to several networks at once. This is especially useful if you’re using mobile data to make online purchases or connect to WiFi hotspots, as it helps your phone automatically switch between them to maximize speed.
However, it is important to note that enabling IPv6 can defeat many security products and bypass your network’s firewalls altogether. This is why it’s essential to use a VPN that has IPv6 Leak Protection built into the platform, such as NordVPN.
How do I enable IPv6?
IPv6 is the latest version of the Internet Protocol, which allows devices to communicate with each other. This new technology uses many more addresses than the older IPv4 protocol.
But there are still many devices that do not support IPv6, even though they can connect to the internet. Those devices may not be secure, or they might experience problems with some websites or services.
Some networks only support IPv4. If you want to enable IPv6 on a device, make sure the network supports it before making any changes.
If your device cannot find an IPv6 address, it’s likely a problem with your router or internet service provider. Try restarting the router or modem and wait a minute before trying again.
Android is the only platform that does not support DHCPv6, which means it has a hard dependency on IPv4 addressing in order to connect to wireless networks. This causes IPv6 connectivity to last only while the device waits for DHCPv4 replies, and then it deassociates from the access point and tears down the connectivity. Enable IPv6 on Android
How do I disable IPv6?
If you’re having problems connecting to websites or services on your Android device, you may need to disable IPv6. Fortunately, disabling IPv6 is easy to do and doesn’t require any special tools or knowledge.
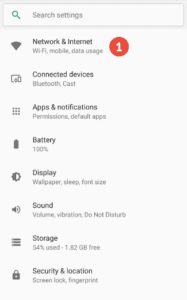
In order to disable IPv6, you will need to change the APN settings on your device to use IPv4 only. You can find this setting by opening the System Settings and tapping on Network & Internet.
Next, tap on the Access Point Names (APN) you’re currently using. Then, scroll down to the APN protocol and select IPv4 from the list.
This will prevent your connection from being routed through IPv6 and will help protect your privacy. This can also be useful if you are connected to a public network or VPN server.
Follow These Steps:
- Open the Settings app on your Android device.
- Scroll down and select “Network & internet.”
- Select “Advanced” and then “IP settings.”
- Choose “Static” from the list of IP options.
- Scroll down and locate the “IP address” field. Type in the IPv6 address you want to assign to your device.
- Locate the “Gateway” field and type in the IPv6 address of your router.
- Scroll down and locate the “DNS 1” and “DNS 2” fields. Type in the IPv6 addresses of your DNS servers.
- Tap “Save” to save the settings.
After completing these steps, your Android device should be configured to use IPv6. Please note that not all networks support IPv6, so your device may fall back to using IPv4 in some cases. Additionally, enabling IPv6 may require additional configuration on your router or network settings, so you may need to consult your network administrator or Internet Service Provider for further assistance.
Leave a Reply