How to Turn on Microsoft Copilot
Turn On Microsoft Copilot has been pushing Copilot into everything from Bing search to the Windows operating system. Copilot helps users unleash their creativity and boost productivity.
But as business leaders work with generative AI for the first time, they have questions about security and privacy. How does it protect sensitive data?
As of my last knowledge update in January 2022, Microsoft Copilot is a collaborative coding tool developed by GitHub in partnership with OpenAI. It is powered by OpenAI’s Codex, the same technology behind GPT-3.5. Since my information might be outdated, I recommend checking the latest official documentation or GitHub announcements for any changes or updates.
Assuming there haven’t been major changes, here’s a step-by-step guide on how to use Microsoft Copilot:
- System Requirements: Before you start, ensure that your development environment meets the system requirements for using Microsoft Copilot. This may include having Visual Studio Code installed, an internet connection, and any additional prerequisites specified by the tool.
- Install Visual Studio Code: Microsoft Copilot is designed to work seamlessly with Visual Studio Code, a popular source code editor. If you don’t have it installed, download and install Visual Studio Code from the official website (https://code.visualstudio.com/).
- Install GitHub Copilot Extension: Microsoft Copilot is integrated into Visual Studio Code through the GitHub Copilot extension. You can install this extension from the Visual Studio Code marketplace. Open Visual Studio Code, go to the Extensions view (you can use the shortcut
Ctrl+Shift+X), and search for “GitHub Copilot.” Click the “Install” button for the GitHub Copilot extension. - Sign in with GitHub: To fully utilize Microsoft Copilot, sign in to Visual Studio Code with your GitHub account. This step is crucial as it allows Copilot to understand your coding style and provide more accurate suggestions. Go to the GitHub Copilot extension settings and sign in with your GitHub credentials.
- Enable Copilot: Once you have installed the GitHub Copilot extension and signed in with your GitHub account, you need to enable Copilot. Open a code file in Visual Studio Code, and you should see a small Copilot icon in the status bar at the bottom of the window. Click on this icon to enable or disable Copilot.
- Start Coding: With Microsoft Copilot enabled, start coding as you normally would. As you type, Copilot will provide suggestions for completing the current line or block of code. It can also generate entire functions or classes based on your input.
Following Steps:
- Accepting Suggestions: Copilot suggestions appear as greyed-out text in the editor. To accept a suggestion, press
Tabor use the suggested completion that appears in the autocomplete dropdown. If a suggestion is not what you need, you can continue typing to provide more context, and Copilot will adjust its suggestions accordingly. - Provide Feedback: Microsoft Copilot is designed to improve over time with user feedback. If you encounter incorrect or unhelpful suggestions, you can provide feedback directly through the extension. This helps the system learn and adapt to different coding scenarios.
- Stay Updated: Copilot may receive updates and improvements over time. Keep your Visual Studio Code and GitHub Copilot extension up to date to benefit from the latest features and enhancements.
Remember that Microsoft Copilot is a tool to assist developers and enhance productivity, but it’s essential to understand and review the code it generates. Always ensure the generated code aligns with best practices, security considerations, and your project requirements.
How to install
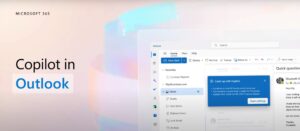
This comprehensive guide will tell you everything you need to know about how to enable and use Copilot in Microsoft Word, Excel, PowerPoint, Outlook, Teams, and other apps in the suite.
Copilot is a side bar that runs unobtrusively alongside your desktop content and app windows. It doesn’t overlap with any of your existing windows and can be accessed at any time through a clickable icon in the taskbar.
To install Copilot, you’ll need a Windows device that has the latest updates and an internet connection with a stable speed. It may take a few moments for the file to download and start installing. Once you’ve completed the process, you can activate Copilot by going to Settings > Personalisation >> Taskbar >> Activate Copilot (preview). You can also enable Copilot using a Group Policy setting.
What is Copilot?
Copilot is Microsoft’s latest productivity tool, designed to make complex tasks easier. It provides intelligent suggestions and automates tasks that can take up a significant portion of a developer’s time.
Copilot integrates with Office and other apps to provide users with a more natural way of working. Users can invoke the tool inside a Word document or a PowerPoint presentation to get suggestions for formatting, improving existing text, and generating a first draft.
Users can also talk to Copilot using Windows’ dictation feature, and the software will reply in their voice, as if they were having a conversation with an actual human. This can save a lot of time because it eliminates the need to tab out of an app just to record a note or do a quick fact check.
To use Copilot, organizations must have a Microsoft 365 E3 or E5 subscription and enable it in the Power Platform admin center. The Ask a question, Scan customer conversation and suggest a response, and Write an email features are currently in preview.
Getting started with Copilot
Copilot is a powerful tool that can help developers write code faster and more accurately. It can also provide helpful advice and code snippets to make it easier to get started with new projects.
To use Copilot, simply click the icon in the taskbar or press the Windows key to launch the AI assistant. It will ask for a question, and then provide suggestions based on your context. You can also search for specific topics to find the exact answer you need.
Admins can easily enable Copilot for their organizations using the Microsoft 365 admin center. In addition, administrators can monitor usage and set policies for Copilot in the admin center. Microsoft will continue to release updates for Copilot that include additional features and capabilities, as well as protections to minimize the risk of data loss or unauthorized access.
Using Copilot
As a Microsoft Graph API-backed feature, Copilot works in conjunction with other Microsoft tools to provide better autocomplete suggestions, grammar and spelling advice, and more. In addition, it helps users collaborate more effectively through natural language prompts and intelligent suggestions to expedite tasks and streamline workflow.
Copilot appears as a panel docked to the right of your screen. It doesn’t overlap your desktop content and runs unobstructed alongside your open app windows so you can interact with it anytime you want.
However, some limitations may impact how well it works. For example, if you ask Copilot to generate code snippets, there is an upper limit on how much code it can return at one time (known as tokens). When the token limit is reached, Copilot will usually offer a truncated response. As a result, it’s important to plan for this and scope prompts accordingly. Also, Copilot isn’t always accurate and will take some time to get used to your personal writing style and vocabulary.
Leave a Reply