Enable the WordPress REST API
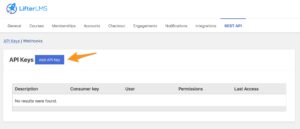
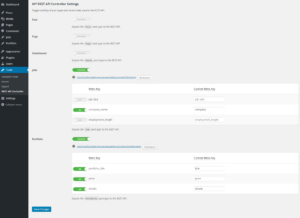
To enable the WordPress REST API, go to your dashboard, and click on the “REST API” menu item. The menu option displays a list of methods that you can call to fetch information. For most of these, you will want to use the “Get Posts” option. The WordPress REST API supports JSON responses and controller classes, which let you build custom endpoints and routes. In most cases, however, you will want to use the existing endpoints and routes.
To enable WordPress REST API, first enable a developer account and log into your dashboard. Once your developers have created a user account, you can grant them access to your dashboard and use the REST API. You can also use Postman to explore and use the WordPress REST API. Once you have set up your REST API, you can start building applications and services to access your site’s data. For this, you will need a valid authorization for your WordPress site.
After you have enabled the REST API, you can then write an API URL. Typically, you’ll use the “GET” request, which sends a request to your WordPress site server. The REST API will return a JSON response based on the route and HTTP action. For example, a URL will look something like this. This response can be read or modified, depending on the nature of the request.
The Fundamental Rules Of REST API:
The WordPress REST API is not difficult to use and is a great way to extend the functionality of WordPress. It’s extremely lightweight, and only 22 lines of code make it an easy plugin to install. It can be used to enable and disable the REST API for particular users, and even force SSL connections. The plugin recommends keeping the API stateless so that it requires the client to provide the necessary information each time the request is made.
To enable the WordPress REST API, you need sash access to the server. To connect to the server, download Putty, a Command Line Interface for Windows Operating Systems. Once you have sash access, enter the IP address of your server. Once you have done this, type the SSH port into the box. After that, click the “SSH” icon to begin communicating with the server.
The Anatomy Of WordPress REST API Request:
Once you’ve enabled the WordPress REST API, you’ll need to enable the REST API. The REST API is a simple web service that allows you to access content and meta-data from any WordPress site. It’s a great way to integrate applications and other services into your WordPress website. It’s also a great way to extend the capabilities of your site. It is important to note that you’ll need to grant a certain level of authorization to allow third-party applications to access the REST API.
After enabling the WordPress REST API, you’ll need to give it proper authorization. This means that you’ll be able to retrieve any content and meta-data from any WordPress site. You’ll be able to use the content and meta-data in applications and websites. In addition, you’ll be able to access your WordPress site’s data from any computer, whether you’re using it directly or through a third-party application.
Bringing the REST API to WordPress:
Once you’ve enabled the WordPress REST API, you’ll be able to access the information that your site publishes. By enabling the WordPress REST API, you’ll have access to content and meta-data on any WordPress site. You can use this information in applications to make them more interactive. When you enable the REST API, you’ll be notified of any changes. If necessary, you’ll need to reactivate the REST API in order to continue using the REST API.
Here’s how to install it:
- Download the WordPress REST API Basic Auth plugin.
- Log in to your WordPress Dashboard and go to Plugins -> Add New.
- Click the Upload Plugin button and select the zip file of the plugin.
- Go to the installed plugins menu and activate the plugin from there.
The WordPress REST API supports basic CRUD operations. By default, all requests are got (get) operations. These requests don’t change any database files. You can also filter for a particular post by its author, or update the post. The result of the query will be a JSON file. When you enable the WordPress REST API, you’ll be able to access a variety of data.
Leave a Reply