
How to Enable UEFI Boot on Windows 10
To enable UEFI boot on Windows 10, you need to open the BIOS setup menu and change the partition style. The process is quite simple, but there are several factors you must take into consideration. For instance, if you want to convert the Master Boot Record (MBR) to a GUID Partition Table (GPT), you must first convert the Master Boot Record to a GPT. If you don’t have a conversion tool, you can simply modify the partition style on the computer. Before converting the partition style, you should check with the manufacturer’s website and make sure that the hardware supports UEFI.
If you are running a computer that doesn’t support UEFI, you must disable the Fast Startup function before attempting this method. The UEFI Firmware Settings menu isn’t available on old PC models. To enable UEFI, you must make sure that your PC’s motherboard supports UEFI. If it doesn’t, you will have to reinstall Windows using the Legacy mode Google.
If your PC doesn’t support UEFI, you can use the Advanced Start-up options menu in Settings. This is located under Update and Security Recovery. Select the “Restart Now” button, then “UEFI Firmware Settings,” and then click OK. You should now see the UEFI Firmware Settings window. To view UEFI settings, choose the Windows boot menu and then hit ENTER.
Check if your computer supports UEFI boot mode
UEFI (Unified Extensible Firmware Interface) is a type of firmware that replaces the traditional BIOS (Basic Input/Output System) found on older computers. UEFI is designed to provide better security, faster boot times, and support for larger hard drives. Windows 10 supports UEFI boot mode and it is recommended to use UEFI mode instead of the older BIOS mode. Here are the steps to enable UEFI boot on Windows 10:
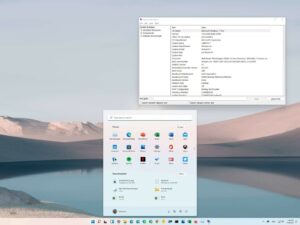
- Not all computers support UEFI boot mode. To check if your computer supports UEFI, go to the system information section of the Windows settings. You can access the settings by clicking on the Start menu and selecting “Settings”. In the settings window, click on “System” and then “About”. Under the “Device specifications” section, look for the “Firmware type” information. If it says “UEFI”, then your computer supports UEFI boot mode.
- Access the UEFI settings To enable UEFI boot mode, you need to access the UEFI settings. The method to access the UEFI settings varies depending on the computer manufacturer and model. However, most computers allow you to access the UEFI settings by pressing a specific key during startup. The key to access the UEFI settings is usually displayed on the startup screen. Common keys include F2, F10, F12, or Del.
- Change the boot mode Once you have accessed the UEFI settings, look for the option to change the boot mode. The option may be called “Boot Mode”, “Boot Option”, or something similar. Change the boot mode from Legacy/BIOS to UEFI.
- Save and exit After changing the boot mode, save the changes and exit the UEFI settings. The process of saving and exiting the UEFI settings may vary depending on the computer manufacturer and model. Look for the option to save and exit or press the key indicated on the screen.
follow the steps to install Windows 10
- Install Windows 10 in UEFI mode To take advantage of UEFI boot mode, you need to install Windows 10 in UEFI mode. This means that you need to create a UEFI bootable USB drive and install Windows 10 from the USB drive. Here are the steps to create a UEFI bootable USB drive:
- Download the Windows 10 ISO file from the Microsoft website.
- Insert a USB drive with at least 8 GB of space.
- Download and install the Rufus software from the Rufus website.
- Open Rufus and select the USB drive from the “Device” dropdown menu.
- Under the “Boot selection” section, click on the “Select” button and select the Windows 10 ISO file.
- Under the “Partition scheme” section, select “GPT” for UEFI boot mode.
- Click on the “Start” button to create the UEFI bootable USB drive.
- Boot from the UEFI bootable USB drive To install Windows 10 in UEFI mode, you need to boot from the UEFI bootable USB drive. Insert the USB drive into the computer and restart the computer. During startup, press the key to access the boot menu. The key to access the boot menu varies depending on the computer manufacturer and model. Common keys include F2, F10, F12, or Esc. Select the USB drive from the boot menu to boot from it.
- Install Windows 10 Once you have booted from the UEFI bootable USB drive, follow the steps to install Windows 10. When you reach the “Where do you want to install Windows?” screen, select the partition with the “GPT” label. This indicates that the partition is formatted for UEFI boot mode. Select the
Leave a Reply