
How to Enable it in Ubuntu
The best way to enable it in Ubuntu Wi-Fi on your Linux system is by setting up a partner repository. In Ubuntu, this can be done by checking a box and selecting a specific network. In order to use this feature, you must have a compatible wireless card. The newest releases of Ubuntu have support for a large number of wireless cards. Nevertheless, it is recommended to use a high-end model of a USB WiFi dongle.
To enable the service, you must first disable the corresponding network card. In the case of a hard drive, you should disable the corresponding network adapter. However, if you’d like to use the NIC as the primary interface, you should install a separate driver for it. If you’d like to use another network card, you should install a network driver for that device. In addition, you can enable the “swap” partition Google.
The main reason to disable the NIC is that it doesn’t support the newer devices. Luckily, the ifdown command works for old networks, such as the ones from Windows. This command will bring up, and disable the network device, but it will not support any new devices. Once you’ve enabled the NIC in your system, you can use Firefox or Chrome to browse the web. You can also use other applications like instant messaging, photo, and video. You’ll need to install the necessary video codecs to run most of these files, including the latest version of enable it in Ubuntu.
How To Ubuntu Download:
Once you’ve installed the NIC, you can begin the installation of Ubuntu by making sure that you have enough space on your hard disk. It’s crucial that you set up the partitions software so that your computer can boot from it properly. If you have never performed this process before, you should follow the directions on the next screen to set up the USB connection. In a few minutes, you’ll have a fully functioning system!
To enable it in Ubuntu this NIC, you’ll need to first enable the free space on your hard drive. If your computer has a direct boot device, you’ll need to change the boot order. If you don’t, the USB adapter won’t be able to work. You can choose to use a USB connection instead. If you have a USB port, it will allow you to access your computer without having to install a new card.
How To Enable Linux On Windows 10:
To enable a USB host device, you need to make sure you’re in a secure mode. You’ll need to choose the USB host option to disable this mode. This way, you’ll be able to select booting from a USB to boot your PC. If you need more storage space, you can select the USB and select a USB drive. When you’ve done this, you’ll be able to access all the applications you want on your system.
If you’re running Ubuntu on a Windows-based machine, you can install the Linux operating system on the same drive as your OS. You’ll need to shrink the Windows partition first, but otherwise, you can choose to install on a separate hard drive. When the installation window opens, you’ll be able to select a different drive. A second partition will appear, and you can continue installing the OS on the other one.
How To Ubuntu Install:
Once you’ve installed Ubuntu, you’ll need to install the software on the USB stick. If you’re a new user, you should install the Ubuntu version first. It’s the default version of Ubuntu. It’s the most popular distribution, and it is very user-friendly. You can also use it on your laptop to run various applications. When you’ve installed the program, you can install it on the USB stick.
To enable the Universal repository, you’ll need to install the tar package from the downloads folder. To install the software, you’ll need to plug the USB stick into your computer. In the installation, make sure to select the right size. If you have multiple USB sticks, the first one should be larger. Then, you’ll have to use the Universe repository. To enable the default repository, you need to run the installer. You can see the file in the downloads folder.
Install and Update Ubuntu Linux:
- Now we will really install the Linux distribution. Go to Start Button> Microsoft Store.
- To see available Linux distributions available, type “Linux” in the search field, then click Run Linux for Windows.
- Click the Linux distribution you would like to install. For this we will choose Ubuntu.
- Click the Find button.
- Windows will download and install Ubuntu. When you are done, click the Start button.
- A terminal window will appear. Wait for Ubuntu to finish installing, then create a new Linux username and password when prompted. Now in your new Linux command line!
- Now is a good time to make sure the software you have installed is up to date. In Ubuntu, you can use the apt-get command to update all packages automatically.
- Personality will connect to their repositories and download a series of packages. When done, use apt-get again to upgrade all packages to their latest versions.
- The list of packages to be upgraded will be displayed. Enter Y with the command to continue the installation.
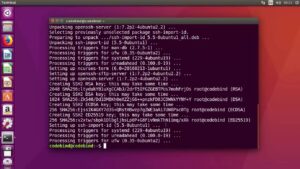
- Ubuntu will now download and install the packages. This process will take at least a few minutes to complete, depending on the speed of your connection and how many packages need to be upgraded.
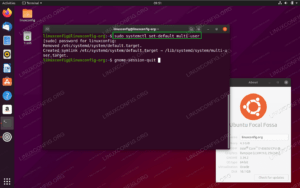
- Finally, use this command to check dependencies and remove disused packages from the system (depending on how long the previous step was taken, you may need to re-enter our password):
- get it, enter Y quickly to install the listed packages.
- You’re done installing and updating Ubuntu Linux! You can launch the Linux terminal at any time by selecting Ubuntu from the start menu.
- Now that you have installed Linux on your system, you can start using OpenSSL to do things like generate CSR and create or remove certificates and private keys in PKCS # 12 / PFX files.
Leave a Reply