How to Enable Form in Angular
Enable Form In Angular is a modern front-end framework that facilitates the development of single-page applications. It also offers several features to help developers create a superior user experience.
The ng update command updates your application’s module dependencies. It also recommends changes that may be required for your application. The Profile Editor component uses Form Builder, a service that provides convenient methods for generating controls. To use this service, add it to the component constructor.
Enabling forms in Angular involves several steps, and it’s a fundamental aspect of building dynamic and interactive web applications. Angular provides a powerful and declarative approach to working with forms, allowing you to manage form data, validation, and user interactions efficiently. In this guide, we’ll cover the essential steps to enable forms in Angular.
Step 1: Set Up Angular Project
Before working with forms, make sure you have an Angular project set up. You can create a new project using the Angular CLI:
ng new my-angular-forms-app

cd my-angular-forms-app
Step 2: Import FormsModule
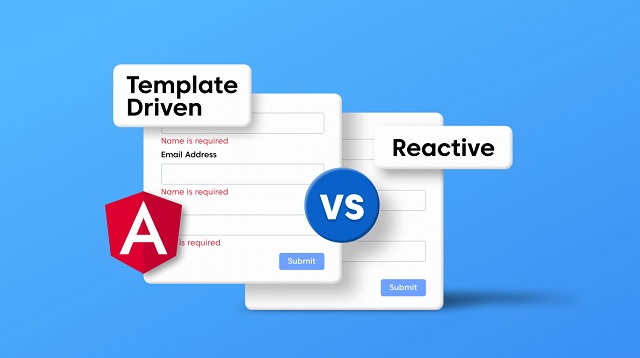
Angular provides two types of forms: Template-driven and Reactive forms. For this guide, we’ll focus on Template-driven forms, which are easier to get started with. Import the FormsModule in your app.module.ts:
// app.module.ts

import { FormsModule } from '@angular/forms';declarations: [
// your components here
],
imports: [
FormsModule, // Add this line
// other modules here
],
bootstrap: [AppComponent],
})
export class AppModule {}
Step 3: Create a Form in HTML
In your component’s HTML file, create a form using Angular’s form-related directives:
<!-- app.component.html -->

<form #myForm="ngForm" (ngSubmit)="onSubmit()">

<label for="name">Name:</label>

<input type="text" id="name" name="name" ngModel required><input type=“email” id=“email” name=“email” ngModel required>
</form>
Here, ngForm is a directive that Angular uses to create a form instance. ngModel is used for two-way data binding, connecting form controls to the component.
Step 4: Implement Form Handling in Component
In your component, implement the necessary logic for form handling:
// app.component.ts

import { Component } from '@angular/core';selector: ‘app-root’,
templateUrl: ‘./app.component.html’,
styleUrls: [‘./app.component.css’],
})
export class AppComponent {
onSubmit() {
// Handle form submission logic here
console.log(‘Form submitted!’);
}
}
Step 5: Add Validation
Enhance your form by adding validation. Angular provides various built-in validators like required, minlength, and pattern. Update your form controls accordingly:
<!-- app.component.html -->

<input type="text" id="name" name="name" ngModel required minlength="3">Step 6: Display Validation Messages
Improve the user experience by displaying validation messages. Angular provides the ngIf directive to conditionally render elements based on form validation:
<!-- app.component.html -->

<div *ngIf="myForm.controls['name'].invalid && myForm.controls['name'].touched">

Name is required and must be at least 3 characters.

</div>Please enter a valid email address.
</div>
TypeScript
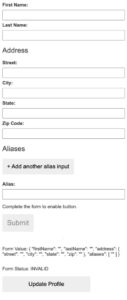
Enable Form In Angular Forms are an essential part of any web application. They allow users to log in, update their profile, and enter other types of data. Whether the data comes from the user or programmatically, forms must keep their views in sync with their model. Angular supports both reactive and template-driven forms, with the latter using two-way data binding to update the model in the view as changes occur.
For template-driven forms, a Form Group instance tracks the state of a group of form controls. Each control is identified by name and tracked in the group. You can add new form controls or replace existing ones by calling the Form Group#set Control method.
To enable Angular Forms, open your component class and import the Form Builder service from the @angular/forms package. Add it to the constructor() method of your component. You can then create a Form Group instance and a Form Control instance. Then, create an ngFor directive to display the form group in your component.
DOM
Structural directives alter layout by adding, removing, and replacing elements in the DOM. These directives look like HTML attributes and are inserted into templates using the @Directive() decorator. They can also be assigned as values to properties of element tags. Angular provides built-in structural directives to add application logic to your view.
For example, you can create a form control to allow users to edit their first name and email address. You can apply the ng-disabled directive to disable the button by binding its value to an application data property. You can also use the ng-disabled attribute to bind a Boolean value to a DOM element’s disabled attribute.
In addition, you can add an Element Ref to the directive’s constructor to inject a reference to the host DOM element. This allows you to access the element’s properties, including its shadow DOM. This is especially useful when you need to apply shadow DOM logic to the host DOM, such as coloring it.
Event handling
An event is a function that Angular calls when you click on an element. You can set the event handler to an expression or method. This is a form of one-way data binding. It lets you tell Angular to connect the child component’s event to an action on its parent.
The Form Group class combines form controls together and tracks their status values. It also allows you to reset a form group to a specific state by passing in a value and validator.
The Form Builder service is provided by the reactive forms module and can be used to create form control and form group instances. It’s easy to add the service to a component by injecting it in its constructor. The constructor also accepts a property, which can be set to any Form Group instance. The default value for this is None, but you can pass in a default control. The value accessor then triggers the set Value() method and emits a value Changes observable. Subscribers to this observable will receive the new value.
Validation
Validation in Angular is essential to ensure that all form fields are filled out correctly. It helps to prevent errors and provide a good user experience. Angular has a built-in validation module that can be used to create template-driven and reactive forms. It allows developers to add validator functions directly to the form control model in a component class. It also enables the component to listen for changes in the form fields and apply them if necessary.
Form groups track the value and validity state of multiple form controls in one object, using each control name as a key. When a control in the group is invalid, the status of the entire group becomes invalid as well.
To use form validation in your application, create a new Form Group instance and assign it to the form element in the component class. Then, bind the input and label to the instance and bind the validation function to the change event on the form. When the change event is triggered, the validation function will run and if it fails, the input label will display an error message.
Conclusion
In just a few steps, you’ve enabled a basic form in Angular, complete with validation and form handling. Angular’s declarative approach and built-in directives make working with forms efficient and maintainable, allowing you to create robust and interactive user interfaces. As you delve deeper into Angular forms, consider exploring Reactive forms for more complex scenarios and dynamic form controls.
Leave a Reply