How to Enable Developer Options on Android
Enable Developer Options On Android is one of the most customizable mobile operating systems on the market. Developer options give users and developers access to advanced settings that can make the phone more useful and fun.
These include ramping down system animation scale for Windows, Transition, and Animator duration, making the device seem faster and more responsive to keypresses. Activating developer options can also help keep the display awake while charging and show visual feedback to taps.
Enabling Developer Options on an Android device allows users to access advanced settings and debugging features. While these options are typically hidden to prevent accidental misuse, unlocking them is a straightforward process. In this guide, we will walk you through the steps to enable Developer Options on your Android device.
Disclaimer: Modifying Developer Options settings can affect the performance and stability of your device. Proceed with caution, and only make changes if you understand the potential consequences.

Why Enable Developer Options?
Developer Options provide access to advanced settings and features designed for app development and debugging. However, regular users may find some options useful for customization and performance improvements.
Prerequisites:
- Unlock Developer Mode:
- Navigate to the “Settings” app on your Android device.
- Scroll down and select “About phone” or “About device.”
- Look for the “Build number” entry.
- Tap on “Build number” seven times in quick succession.
- You will see a message indicating that Developer Mode has been enabled.
Enabling Developer Options:
- Access Developer Options:
- After enabling Developer Mode, go back to the main “Settings” screen.
- Scroll down to find and select “System” or “System and Updates,” depending on your device.
- Locate Developer Options:
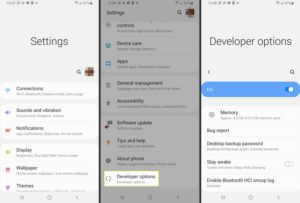
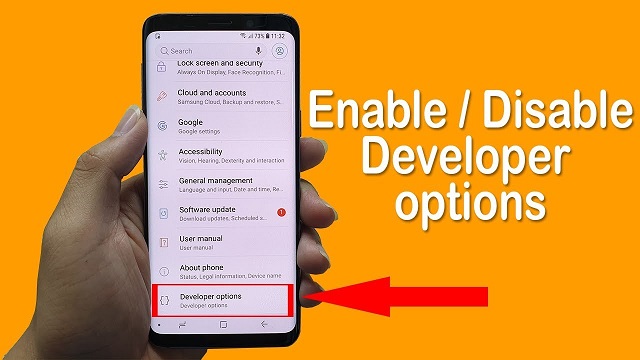
- Look for the “Developer options” menu. It may be directly visible in the main settings menu, or you may need to go into an additional sub-menu like “Advanced” or “System.”
- If you cannot find Developer Options, use the search bar in the settings app and type “Developer options” to locate it.
- Enable Developer Options:
- Toggle the switch at the top of the screen to enable Developer Options.
Configuring Developer Options:
- USB Debugging:
- One of the most useful features in Developer Options is “USB Debugging.” It allows your device to communicate with a computer via a USB connection for debugging purposes.
- Find and enable “USB Debugging” within the Developer Options menu.
- Stay Awake:
- To prevent your device from going to sleep while connected to a computer, you can enable “Stay awake” under Developer Options.
- OEM Unlocking:
- If you plan to unlock the bootloader of your device, enable “OEM unlocking” in Developer Options. Note that unlocking the bootloader may void your warranty and erase all data on your device.
- Limit Background Processes:
- To optimize performance, you can limit the number of background processes by adjusting the “Limit background processes” option. Choose between Standard Limit, No background processes, or Limit to 4 processes.
- Force GPU Rendering:
- If you experience graphical issues in certain apps, you can force GPU rendering in Developer Options to improve performance.
Troubleshooting:
- Developer Options Not Visible:
- If Developer Options are not visible after enabling Developer Mode, reboot your device, and check again. If the issue persists, ensure that you followed the steps correctly.
- Device-Specific Instructions:
- Some devices may have variations in their settings menu. Consult your device’s user manual or search for specific instructions based on your device model.
- Software Updates:
- Ensure that your device is running the latest software version. Some manufacturers may move or rename Developer Options in software updates.
- Security Concerns:
- Be cautious when enabling certain options, especially those related to debugging or modifying system settings. Incorrect configurations can lead to instability or security vulnerabilities.
Settings
Enable Developer Options On Android devices have a number of hidden tweaks and customization options that can significantly improve performance and functionality. These features are mainly intended for developers testing apps and can be found in the Developer Options menu, which is usually located under the System menu or above the About Phone option. These advanced settings can change audio codecs, enable mock locations, modify GPU features, and speed up animations. However, these options are disabled by default to prevent them from having unintended consequences for regular users.
The Developer Options screen allows you to configure system behaviors that help profile and debug app performance. This includes enabling debugging over USB, capturing a bug report on your device, visual feedback for taps, flashing window surfaces when they update, and using the GPU for 2D graphics rendering. It can also allow you to keep your display awake while charging, a feature that is particularly useful for gamers and other people who use their phone continuously.
There are three main ways to disable developer options on android: using the toggle bar, clearing setting’s storage, or factory data reset. The toggle bar method is the easiest and fastest to use. It also allows you to quickly re-enable developer options on your phone when needed. The Clear Settings’s storage method, on the other hand, is a bit more complicated and requires you to manually open the Settings app, go to About Phone, then tap the Build number seven times.
About Phone
If you’re an Android user who likes to tweak your device, tinker with system settings, or even develop apps, enabling developer options on android is essential. It unlocks a treasure trove of advanced settings that can improve performance, optimize battery life, and customize the look and feel of your phone.
To enable developer options on your device, open the Settings app and navigate to About phone or Software information. Tap the Build number (or a similar option) multiple times, usually seven or more, until you see a message saying that you are now a developer! On some devices, you may also be asked to enter a PIN or pattern to verify your actions.
Once you have enabled developer options, a new menu will appear in the Settings app. You can also add selected developer options to your Quick Settings panel by tapping the Developer options toggle at the top of the screen. Remember, however, that developer options aren’t meant to be fiddled with unless you understand what they do and have a good reason for doing so. Most importantly, you should know that changing or disabling these options can cause your phone to stop working properly. This is why it’s always a good idea to enable the feature only when necessary, and to keep it turned off when not in use.
Kernel Version
Developer options are a set of settings that allow you to tinker with the inner workings of your Android device. They are powerful and can have a major impact on performance. They also can cause problems if misused. Luckily, they are very easy to enable and can be used as a way to improve your device’s performance.
To enable developer options, go to your device’s settings and scroll down until you find the “About Phone” or “Software Information” option. Once you locate this, tap the “Build Number” option seven times continuously. Once you’ve done this, a message will pop up letting you know that you are now a developer. you have enabled developer options, you will be able to access them by going to your settings menu and clicking on “Developer Options.”
The Developer Options menu provides a variety of features that can be helpful for app development. These include USB debugging, which allows you to connect your device to a computer for debugging purposes. It’s also possible to toggle changes that affect platform API behavior. If you’re unsure about any of these, be sure to consult your documentation before activating them. Also, be aware that changing these settings can cause a device to behave differently, and you may not be able to reverse the effects of certain changes.
Build Number
The Android build number is a specific identifier that tells you what software version your device is running. It is also used by software developers to keep track of changes and bugs in each version, so it is useful for all kinds of reasons.
You can find the build number in your Android settings. It can be found in the “About Phone” or “System” section and may vary depending on your device manufacturer and the version of Android. You should tap the build number (typically seven times in a row) to enable developer options. Some devices may ask you to enter your PIN or pattern to verify your action, and then a message will appear saying that you are now a developer.
Whether you are a software developer or just an interested Android user, the Developer Options menu provides access to a wide range of advanced features that you can use to tweak your device’s performance and appearance. Some of these features include USD debugging, boosting the speed of video games, and more. But it’s important to note that the Developer Options menu can potentially cause stability issues with your device, so you should always use it carefully and never change any settings that aren’t labelled as such. Android Authority may earn commission from purchases made via links in this article.
Conclusion:
Enabling Developer Options on Android allows users to unlock advanced features and customization options. While it’s a powerful tool, use it responsibly and only make changes if you understand their implications. If you encounter issues, you can always disable Developer Options or reset them to their default values. Enjoy exploring the additional capabilities of your Android device!

Leave a Reply