
How to Change LAN Settings in Chrome
To change the LAN settings in Chrome, you’ll first need to find the IP address and port number of your computer. Once you’ve located these, click on the “Automatically detect settings” box in the Local Area Network Settings dialog box. The box is checked, you can select the settings you want to use. Once you’ve made your changes, you can revert to the default settings.
In some cases, you may want to override or disable the Chrome proxy settings. If you are unable to access a service or website, you should contact the support team of your VPN provider. These professionals can provide you with assistance in setting up the proxy settings in your browser. Here’s how Google.
Open the Chrome setup window and type the desired settings in the search box. Chrome will display a list of settings that match your search criteria. In Windows, you can find advanced settings in the system menu. Go to the Internet Properties window and select the LAN Settings button. Choose “Automatically detect settings” or “Use Automatic Configuration Script.”
On Windows:
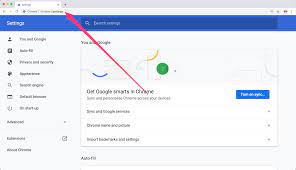
- Open Chrome.
- Click the three dots in the top right corner and select Settings.
- Scroll down and click Advanced.
- Under System, click Open your computer’s proxy settings.
- This will open the Internet Options window.
- Go to the Connections tab and click LAN settings.
- Here you can configure your LAN settings:
- Automatically detect settings: This is the default option and recommended for most users.
- Use a proxy server for your LAN: If you need to use a specific proxy server, enable this option and enter the address and port number.
- Advanced: This section allows you to configure exceptions for specific websites that shouldn’t use the proxy server.
- Once you’ve made your changes, click OK to save them.
On macOS:
- Open Chrome.
- Go to Preferences (usually under the Chrome menu).
- Click Advanced.
- Under Network, click Settings.
- This will open the Network preferences in System Settings.
- Select Proxies from the sidebar.
- Choose the connection type you want to configure (e.g., Automatic or Manual).
- If using Manual, enter the address and port number of your proxy server.
- Click OK to save your changes.
Important notes:
- Changing LAN settings is usually not necessary for most users. If you’re unsure whether you need to do this, consult your network administrator or internet service provider.
- Incorrect LAN settings can prevent you from accessing websites. Make sure you have the correct information before making any changes.
- Using a proxy server can impact your browsing speed and security. Be aware of the risks involved before using one.
If you need further assistance or have specific questions about your network configuration, it’s recommended to contact your network administrator or internet service provider for guidance.
How to override or disable Chrome proxy settings:
To disable the proxy, you can either disable the automatic configuration or specify a manually configured proxy. Chrome allows you to specify three lists of proxy servers. You can also specify a list of proxy bypass rules, which determine whether a given URL should go through a proxy. Chrome defaults to use the Windows proxy settings. If you want to override the proxy settings, however, you need to configure it manually.
There are several reasons for manually configuring proxy settings in Google Chrome. It can be for security reasons, to balance data traffic or to control employee usage. There are also situations where you want to browse the web anonymously, or connect to a business server. These circumstances are listed below. If you are interested in figuring out how to manually configure proxy settings in Google Chrome, follow the steps below. Once you have completed the process, your browser will be configured correctly.
How to manually configure Proxy Settings in Google Chrome:
The first step in manually configuring proxy settings in Chrome is to run a command line program. Depending on your environment, you may need to run the program from the command line. Then, type man google-chrome to get more information about flags and environment variables. You may find it difficult to edit the menu, but it is possible to insert the necessary proxy information. There is also a way to configure a proxy server on the fly.
Proxy Setting In Google Chrome:
- Click the Chrome menu in the Chrome toolbar in the browser toolbar.
- Select Settings.
- Click Show advanced settings.
- In the “Network” section, click Change proxy settings. …
- Click on the Connections tab, and then on LAN Settings.
- Under the hosting server, click to select Use a hosting server in your LAN checkbox.
- In the address box, type the IP address of the hosting server.
Alternatively, you can download a proxy manager to simplify the process. This software offers an intuitive interface and can help you set up proxy settings on other browsers, including Google Chrome. Once you have configured your proxy settings in Google Chrome, you can browse the web with more privacy and security.
Leave a Reply