
How to Enable Secure Boot for Windows 11
Enable secure boot for Windows 11 is available to download, but it comes with a whole new set of system requirements. One of these is Secure Boot, which is part of the Unified Extensible Firmware Interface (UEFI) specification. The UEFI standard defines a new interface between the operating system and the BIOS or firmware on the computer. If your computer doesn’t support Secure Boot, you will encounter a warning message saying “This PC cannot run Windows 11”.

If you’re wondering how to enable secure boot for Windows 11, the first step is to check the UEFI Google settings on your motherboard. Most motherboards have a tab for advanced startup options. Click on the Advanced Boot Options option. In this tab, select the Secure Boot setting. If you see an option named Enabled, select it and click the OK button. If you see an option called Disabled, click on it.
You’ll find the UEFI settings on the manufacturer’s website. Press the appropriate key repeatedly to enter the setup mode. You may need to use the Function keys, Esc, or Delete keys to enter setup mode. Then, select Enabled, and Windows 11 will now install without any trouble. The UEFI settings are different depending on your computer’s model. The steps to enable Secure Boot on Windows 11 are very similar to those for other operating systems.
How To Enable Secure Boot In Bios Windows 11:
You must also make sure that your UEFI Firmware settings are up to date. UEFI Firmware settings vary from computer to computer, so check with the manufacturer’s support site for more details. To enable Secure Boot, you should go to the advanced startup option. After that, you should select Enabled to enable this feature. Once enabled, Windows 11 will install. Once this process is complete, you should be able to use the system to download and install applications.
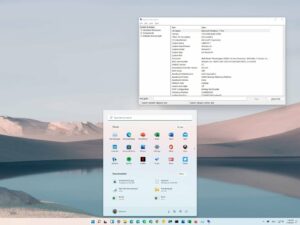
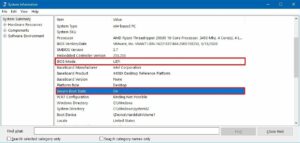
To enable Secure Boot, you need to have a compatible PC with a compatible operating system. Simply open the Run dialogue box and type in msinfo32. Then, you should see the various details about your system, including its Secure Boot Status. Then, you’ll need to restart your computer. This is a process that can take some time, but you’ll be able to finish it successfully with Windows 11.
Enable Windows 11 Secure Boot Fix:
After selecting UEFI BIOS mode, you must enable the Secure Boot feature. This option allows you to select the correct hardware for your computer. Once the system is installed and configured, you must enable the secure boot feature. Otherwise, your PC will not boot up. If you don’t know how to enable secure-boot on your PC, you’ll need to consult the hardware manufacturer’s website. It is recommended that you backup your computer after installing the OS, since the safe boot state can lead to security issues.
If you’re having trouble booting your computer, you can download the PC Health Check app on Google Play. It will show you whether your PC can support Windows 11, and which components are missing. Once you have installed the Secure Boot program, you’ll need to enable the TPM and Secure Boot. After this, you’ll have to click through a few menus to enable these features on your PC. If you’re not sure how to enable secure boot, visit our official article.
How To Enable Secure Boot In Legacy Bios:
After installing Windows 11, you should enable Secure Boot. It’s best to choose a secure boot option for your PC. You should always choose the option on your PC that supports it. By enabling Secure Boot, you can prevent malware from attacking your PC. Then, you can install the latest Windows updates from trusted sources. Once you’ve selected the driver, you can choose the language you want to install. You can then continue to use the software.
Follow The Steps Below:
- Select “Secure Boot”.
- Select “OS Type” and next to it, select “Windows UEFI Mode”.
- Go to the “Log Out” tab to save the changes and restart the computer.
- TPM and Secure Boot will be enabled after restart.
Once you’ve installed the Windows security update, you can enable Secure Boot in the BIOS. If your BIOS is not UEFI, Windows will not recognize the new security chip. It is also possible to enable the Secure Boot on your PC using the system information tool. This tool shows the TPM and Secure Boot status of your computer. You should save this setting and restart your computer when you’ve finished installing your system.
Leave a Reply