How To Enable Android Developer Options
Enable Android Developer Settings smartphones have a range of power features that software developers might use, but that general users won’t. These are called “Developer Options” and they let you configure system behaviors that help improve app and device performance.
But be careful — changing these settings can cause problems with your phone’s stability or battery life. Here’s how to enable Developer Options on an Android phone or tablet.
Follow These Steps:
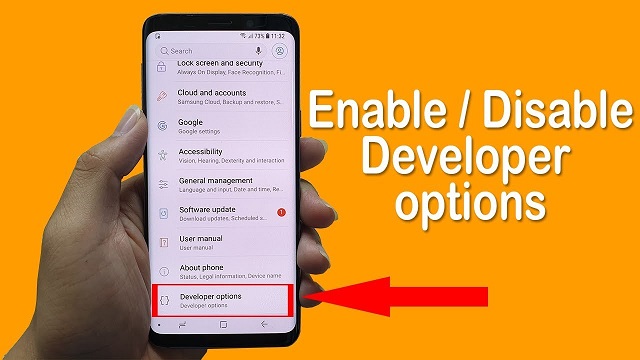
1. Accessing Settings: Start by unlocking your Android device and navigating to the home screen. Swipe down from the top of the screen or find the Settings app in your app drawer. The Settings app typically has a gear icon and is a central hub for configuring various aspects of your device.
2. Locating About Phone: Once in the Settings app, scroll down and look for an option usually labeled as “System” or “About Phone.” The exact location of this option may vary slightly depending on your device and the Android version it’s running.
3. Accessing Software Information: Tap on “System” or “About Phone” to access additional information about your device. In this section, you’ll find details about your device, including the Android version, model number, and other relevant information. Look for an option like “Software Information” or “Build Number.”
Follow These Steps:
4. Tapping Build Number: Locate the “Build Number” entry within the “Software Information” section. To enable Developer Settings, you need to tap on the “Build Number” multiple times. On most devices, you’ll need to tap it seven times consecutively. As you tap, you may be prompted to enter your device’s PIN or unlock pattern to confirm your action.
5. Entering Device PIN or Pattern: Security measures are in place to ensure that only authorized users can enable Developer Settings. If prompted, enter your device’s PIN or unlock pattern. This step is essential to prevent accidental activation of advanced settings.
6. Developer Mode Activation: After successfully entering your PIN or pattern, you should see a message indicating that Developer Mode is being activated. This message may vary slightly between different devices and Android versions. You might also be required to enter your device’s password if you have one set up.
Follow These Steps:
7. Developer Options Unlocked: Once Developer Mode is activated, you’ll now have access to Developer Options in the main Settings menu. It’s usually located above or below the “About Phone” section. The appearance may vary, but it’s generally a separate menu with advanced settings tailored for developers and debugging purposes.
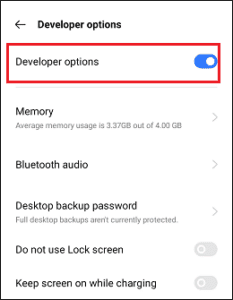
8. Accessing Developer Options: Open the newly unlocked Developer Options menu. Here, you’ll find a plethora of advanced settings that are not available in the standard user interface. Take your time to explore these options, but be cautious, as some settings can have a significant impact on the functionality of your device.
9. USB Debugging: One of the most commonly used features within Developer Options is “USB Debugging.” This option allows your Android device to communicate with a computer via a USB connection, enabling the use of debugging tools for app development or advanced troubleshooting. Toggle the switch next to “USB Debugging” to enable this feature.
Follow These Steps:
10. Other Developer Options: While in the Developer Options menu, you can explore various settings such as “OEM Unlocking,” “Advanced Reboot,” and “Force RTL Layout Direction.” Keep in mind that some options are intended for developers and may not be suitable for regular users.
11. Resetting Developer Options: If you ever want to hide Developer Options again, you can do so by going back to the main Settings menu, finding the “System” or “About Phone” section, and tapping on “Reset Options” or “Reset Settings.” This option may also be labeled as “Reset” or “Reset Settings” depending on your device. Confirm the action, and Developer Options will be hidden once again.
12. Using Developer Options Responsibly: It’s important to note that some Developer Options can affect the stability and performance of your device. Exercise caution and only modify settings if you understand their implications. Misconfiguring certain options may lead to unexpected behavior or even data loss.
How to Enable Developer Options
Developer options are a hidden feature that gives you more control over your Android phone. It can be used for a number of things, including USD debugging and boosting the speed of video games. It also lets you check what apps are sapping your device’s memory.
The menu is accessed by tapping the build number on your Android device seven times. This opens the Developer Options screen. This option is primarily for app developers and advanced users, but it can be beneficial for anyone who wants to know what’s going on behind the scenes.
It’s important to note that the menu can cause performance issues on your Android device, so you should only make changes with caution. You can disable the Developer Options menu by returning to the Settings page and tapping on the toggle at the top of the screen.
Step 1: Find the Build Number
Unlocking the Developer Options menu opens up a world of possibilities for both tech enthusiasts and app developers.
The build number varies depending on the specific Android version and device manufacturer, but it’s typically found in the “About Phone” or “System” section. Tap the build number 7 times quickly to enable Developer Mode. You may be asked to enter a PIN or unlock pattern to confirm the action. Enable Android Developer Settings
The build number consists of a letter and two numbers, where the first letter represents the quarter (A is Q1 2009, F is Q2 2010) and the second number counts the days in that quarter (F85 is June 24, 2010). You can also find this information by accessing a few config fields through the Build Config method.
Step 2: Tap the Build Number 7 times
Android’s developer options offer a range of advanced settings and tools that aren’t available to general users. With the right knowledge, however, these hidden features can help you unlock the full potential of your device.
To enable Android’s Developer Options, open the “Settings” app and scroll down to find the “About Phone” or “Software Information” option (the location varies from device to device).
Step 3: Tap the Settings button
The enabling process for these settings is different on each manufacturer and version of Android. To access the developer options screen, open the Settings app and navigate to the About Phone or Software Information (on Samsung devices). Tap the build number multiple times until a message indicating you are now a developer appears.
It is important to remember that careless use of these settings could negatively impact your device’s performance and stability.
Step 4: Tap on Developer Options
Enable Android Developer Settings menu is a hidden feature on Android phones. It contains a variety of settings that software programmers use to test their apps and manipulate system responses.
It’s important to note that changing any of the settings in the developer options menu can cause your phone to stop working properly. That’s why it’s important to only change these settings if you’re a professional app developer.
To access the Enable Android Developer Settings menu, navigate to the “About Phone” screen and tap the build number seven times. You should then receive a pop-up that says, “You are now a developer.” From there, you can enable the options that you want to change. You can also deactivate the menu if you no longer need it. However, it’s important to note that deleting the developer options menu will disable USB debugging on your device.
Leave a Reply