
How do I enable cache writing?
Enable Cache Writing is a feature offered by Google Cloud Platform that can help improve the performance of your applications by temporarily storing frequently accessed data in memory. This can reduce your application’s time to read data from slower storage devices, such as hard disk drives. This blog post will show you how to enable write caching for your Google Cloud Platform volumes. We will also discuss the limitations of write caching and provide some tips for using it effectively.
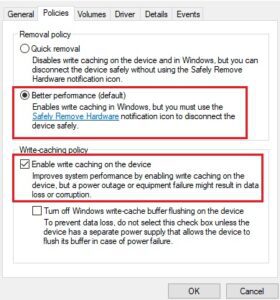
Enable write caching for an existing volume.
Write caching is a powerful feature that can significantly enhance the performance of your applications by reducing the latency of read operations. However, it’s important to note that write caching is disabled by default for all existing volumes. If you want to leverage the benefits of write caching, you must enable it explicitly.
There are two ways to enable write caching for an existing volume: the Google Cloud CLI or the API. The CLI command is relatively straightforward:
cloud compute disks update DISK_NAME \–enable-write-caching Be sure to replace `DISK_NAME` with the actual name of the disk for which you want to enable write caching.
If you prefer to use the API, you can follow these steps:
1. Open the Cloud Console and go to the **Compute Engine** page.
2. Click on the **Disks** tab.
3. Select the disk to enable write caching and click the **Edit** button.
4. In the **Edit Disk** dialog box, check the **Enable write caching** checkbox.
5. Click on the **Save** button.
Once you’ve enabled write caching, your volume will start caching frequently accessed data in memory. This can significantly improve the performance of your applications, especially if they’re dealing with large amounts of data.
There are a few things to keep in mind when using write caching:
- The maximum size of a volume with write caching is 128 TiB.
- The maximum amount of cache per volume is 128 GiB.
- You can only enable write caching for a standard or balanced persistent disk.
Use write caching for new volumes.
Enable Cache Writing is enabled by default for new volumes created on Google Cloud Platform. However, you can turn off write caching if needed. Write caching is only available for standard volumes, not encrypted volumes mounted in read-only mode or using the sparse storage option.
If you are creating a new volume and want to enable write caching, you can do so by following these steps:
1. Open the Google Cloud Console and go to the Compute Engine page.
2. Click on the “Disks” tab.
3. Find the volume you want to create and click the “Create” button.
4. In the “Storage” section, select the “Standard” storage type.
5. In the “Write Caching” section, select the “Enabled” option.
6. Click on the “Create” button to create the volume.
Write caching can improve your applications’ performance by reducing write operations’ latency. However, it is essential to note that write caching can also increase the risk of data loss in the event of a power or other hardware failure. Therefore, before enabling it, weighing the benefits of write caching against the risks is essential.
Check if write caching is enabled.
We will cover how to check the status of register caching in the Azure portal using PowerShell, the Google Cloud CLI, the AWS CLI, and the IBM Cloud CLI.
**Azure portal**
1. Open the Azure portal and navigate to the “Disks” page.
2. Select the disk you want to check and click the “Properties” tab.
3. The “Write Caching” section will show the current status of write caching.
**PowerShell** Get-AzDisk | Select-Object Name, WriteCaching
**Google Cloud CLI**
cloud compute disks list | grep write-caching
**AWS CLI**
aws ec2 describe-volumes | grep WriteCaching
**IBM Cloud CLI**
IBM Cloud is block storage volume-list | grep write-caching
It is important to note that the specific commands and syntax may vary slightly depending on the version of the CLI you are using.
Write cache limitations
Write caching is a great way to improve your applications’ performance, but it has some limitations.
Caching cannot be used with multi-attach volumes, which are volumes that are attached to multiple instances at the same time. This is because write caching can only be used with a single instance at a time.
Write caching also cannot be used with volumes formatted as FAT32. FAT32 is an ancient file system that does not support write caching.
Write caching can only be used with unencrypted volumes. This is because write caching stores data in a temporary location on the disk, and this data can be accessed by anyone who has access to the disk. If the volume is encrypted, the data in the write cache will also be encrypted, making it inaccessible to anyone who does not have the encryption key.
Write caching can only be used with volumes that have snapshots. Snapshots are backups of volumes that can restore the volume to a previous state. This is because write caching stores data in a temporary location on the disk, and this data can be lost if the disk fails. If the volume has a snapshot, then the data in the write cache can be restored from the snapshot if the disk fails.
Tips for writing caching
Enable Cache Writing can be a powerful tool for improving the performance of your applications, but it’s essential to use it effectively to avoid data loss. Here are a few tips for using write caching effectively:
**Use write caching for read-intensive workloads.** Write caching is most effective for read-intensive workloads like web servers or databases. Writing caching can decrease performance for write-intensive workloads, such as file servers or backup systems.
**Choose the correct volume size.** The size of the write cache should be based on the workload. A more extensive write cache is beneficial for workloads with a high write-to-read ratio. A smaller write cache is sufficient for workloads with a low write-to-read ratio.
**Optimize your workload for write caching.** There are a few things you can do to optimize your workload for write caching, such as:
– Using a block size that is aligned with the write cache size.
– Using a file system that supports write caching.
– Disabling unnecessary write operations.
**Monitor write caching performance.** Monitoring write caching performance is essential to ensure it meets your expectations. You can watch write caching performance using the following metrics:
– Write cache hit rate: This metric measures the percentage of write operations served from the write cache.
-Cache miss rate: This metric measures the percentage of write operations not served from the write cache.
– Write cache latency: This metric measures the average latency of write operations served from the write cache.
By following these tips, you can use write caching effectively to improve the performance of your applications.
Leave a Reply